• Welcome back Guest!

    MARSH is a private reefing group. Comments and suggestions are encouraged, but please keep them positive and constructive. Negative threads, posts, or attacks will be removed from view and reviewed by the staff. Continually disruptive, argumentative, or flagrant rule breakers may be suspended or banned.

Waterbox 130.4 Tank Journal (1 Viewer)

Users who are viewing this thread

Tenny

Supporting Member
Build Thread Contributor
Joined
Jul 18, 2018
Messages
755
Reaction score
588
Location
League City
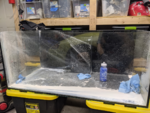
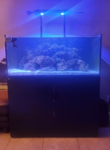
So last week I picked up this Waterbox 130.4. I currently have a 65g tank, but it's currently too full with the fish and coral I keep buying.

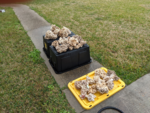
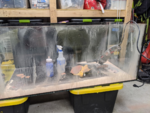
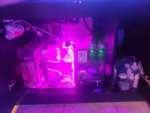
Came with everything in picture (including the Kessil AP700, Reef Octopus 160 Classic, DC Return Pump, Jebao Pumps, etc) other than fish (I didn't want them). Some may have seen it on FB... and I got it a fair amount cheaper than the ask.
1579041211208.png
1579041358497.png

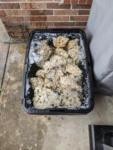
After I got it home, I immediately began the "sterilization" process. I have the rocks all in bleach. All the other components went into a vinegar bath for 48 hours and are now air drying. The rocks will come out of the bleach this Thursday and I will begin rinsing them, and running different chlorine removers and then air drying for 2 weeks.

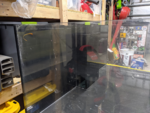
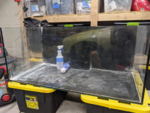
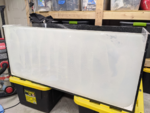
The tank after I got it home:
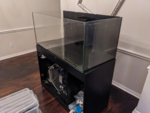
1579041548739.png

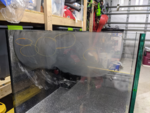
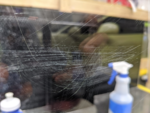
Unfortunately after I got it back I noticed there were a ton of scratches. I think with water in the tank they were not noticeable, but without the water they are very noticeable.

Scratches are mostly on the front face, a few on the sides:
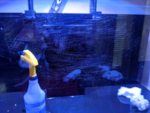
1579042210433.png

I have to imagine sand got in the magnet cleaner...

Now since I have a few weeks prior to needing it I figured I should reach out and try and get the scratches removed. Pretty much everyone I talked to said you can't do that. Online a lot of places said you can, just you have to sand it down. I tried removing scratches from a tank many years ago and it didn't do anything, but I only used cerium oxide, I didn't sand it down at all.

Nervous about this... I figured the best plan was to take one of the 10g quarantine tanked I have and just scratch that up:
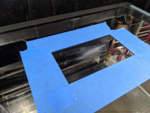
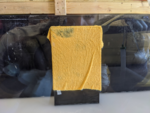
1579042262170.png

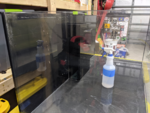
Went online and bought a GP-WIZ scratch removal kit. Ran it through multiple sanding pads:
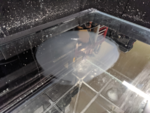
1579042317246.png

Then I finished it off with the Cerium Oxide polishing:
1579042356732.png

Scratches aren't 100% gone, but they are about 95% gone and when I hit it with more cerium oxide I was able to get even more out. Not bad for about 30 minutes of work total. I know if I continued I'd get even more out.

So at this point I've ordered more polishing pads and need to get a neighbor to help me move the aquarium where I can do this in the garage. Should have that done completely before the rocks are ready to go back in.

So at this point:
  • Tank
    • Currently: Waiting on polishing supplies
    • Next Step: Remove scratches.
  • Rocks
    • Currently: Soaking in Bleach
    • Next Step: Rinse / Dechlorinate
  • Livestock:
    • Currently: In old tank
    • Next Step: Move them all into QT for CP treatment
  • Corals
    • Currently: In old tank
    • Next Step: Remove fish, wait 76 days for rocks with corals. Rocks without corals bleach.

I have a long ways to go, but it'll be worth it in the end to know for a fact there are no diseases in the aquarium and have a bigger more roomy aquarium.
 

ITreefer

Supporting Member
Joined
Sep 29, 2017
Messages
1,007
Reaction score
1,025
Location
Houston/Cypress
Nice set-up 👍
Those scratches were probably quite the buzzkill. Hopefully your plan to remove them works out.
Is this going to be SPS dominant or mixed?
 
OP
OP
Tenny

Tenny

Supporting Member
Build Thread Contributor
Joined
Jul 18, 2018
Messages
755
Reaction score
588
Location
League City
Nice set-up 👍
Those scratches were probably quite the buzzkill. Hopefully your plan to remove them works out.
Is this going to be SPS dominant or mixed?
Thanks, yeah when I got it home it was a huge buzzkill. There wasn't a mention of it in the ad, and when I looked over it I saw a couple... But not that much. My plan will work out great or I'll waste a tank lol.

Going to stick with what I have. Mostly a zoa garden with a stick here and there.
 

ITreefer

Supporting Member
Joined
Sep 29, 2017
Messages
1,007
Reaction score
1,025
Location
Houston/Cypress
Thanks, yeah when I got it home it was a huge buzzkill. There wasn't a mention of it in the ad, and when I looked over it I saw a couple... But not that much. My plan will work out great or I'll waste a tank lol.

Going to stick with what I have. Mostly a zoa garden with a stick here and there.
Yeah it sucks when sellers aren't as forthcoming as they should be with flaws or defects. I bet we've all been burned like this before lol
Your before and after pictures on the test tank give me some confidence it will work.
 
OP
OP
Tenny

Tenny

Supporting Member
Build Thread Contributor
Joined
Jul 18, 2018
Messages
755
Reaction score
588
Location
League City
yeah I messaged him after and said "you didn't disclose all the scratches" and he basically didn't feel there were enough to mention. Perhaps the water will hide 95% of those, but I don't feel that way. All the polishing stuff comes in today so hopefully I can get started tomorrow. Just need to get the neighbors son to help me move the tank. I can move the 65g by myself, but this is just too much.
 
OP
OP
Tenny

Tenny

Supporting Member
Build Thread Contributor
Joined
Jul 18, 2018
Messages
755
Reaction score
588
Location
League City
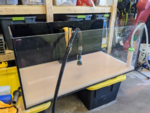
Started the process this morning. I am attacking the "left" side of the aquarium because that will be against the wall and if I screw up... I want to screw up there.

Unfortunately I forgot to get a before shot on that side, but I circled the scratches on the outside.

This is after the 600 grit sandpaper:
1579289080542.png

Continued to 800, 1000, 1500, 2000, 2500 and here I am:
1579289345304.png

There is a faint hue in that picture, but generally speaking it looks pretty good.

Next up is the polishing with cerium oxide:
1579289408401.png

The scratches are all gone, the glass has no hue or anything and looks great. There may be a little scratch on it somewhere, but I couldn't find anything. Super happy with the results. Next up is the two sides that matter to me. I ran out of the sand paper (you go through a LOT) thanks to amazon same day I should get something tonight. I work 10 hours tomorrow so I'm not sure how much I'll get done. Would be nice to be done with this by Monday night!

Obviously next time I'll remember to get before shots.
 
OP
OP
Tenny

Tenny

Supporting Member
Build Thread Contributor
Joined
Jul 18, 2018
Messages
755
Reaction score
588
Location
League City
Made a bit of progress this morning. I started on the front face and it was a lot harder the other ones I've done previously. Mostly because I couldn't tell if the scratches were removed or not since it was hazy. What eventually I started doing was remove as much as I could easily see then start circling with a dry erase marker of the spots where I found little scratches. I did get a lot of the big deep ones removed as those were easy to find.

I also found the 5" sanding discs of amazon weren't as good as the glass polish brand ones (gp-wiz). I think this was because you could isolate the spot with the 3" disc vs the 5" disc.

Another general statement is I am trying to sand the whole face down and not just the individual spots, Trying to avoid creating a pit where it may cause additional stress or optical illusions. While I feel like I'm taking off a lot of glass, I realize I am really taking off a very small amount. So at this point I'm not worried about the potential of it becoming too thin to hold the tanks capacity.

Before pic in this location:
1579376240821.png

After some sanding I could still see some of the bigger scratches:
1579376310997.png

Started circling the scratches I could see:
1579376410775.png

Done for the day this is with 800 grit sandpaper:
1579376634825.png

A close up of the area that the scratches were earlier:
1579376667601.png

So as I progress to 1000 grit, 1500 grit, 2000 grit, 2500grit those little surface scratches will get smaller and smaller. I don't think I need to use the 2000/2500 as the GP-WIZ kit seems to end at 1000 or 1500 (guessing here) but I think this allows me to speed the cerium oxide part and not spend days doing that.

As I progress I should see more and more scratches I failed to remove. Hopefully it's just a quick touch up with the GP-WIZ kit at that point for those little spots.
 
OP
OP
Tenny

Tenny

Supporting Member
Build Thread Contributor
Joined
Jul 18, 2018
Messages
755
Reaction score
588
Location
League City
Continued on this yesterday and this morning.

Went up in the sand paper and it got a bit better:
1579559013850.png
1579559033632.png

Unfortunately found a few spots that need more sanding help:
1579559061634.png

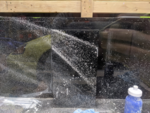
So I continued to sand and sand... then I moved onto the Polish. I got splatter everywhere!
1579559093936.png


In the following pictures below there actually is nothing on the front glass. All that Splatter is on the back.
1579559131903.png
1579559196695.png

So that was all as of yesterday. Today I just continued polishing the front glass. The scratches at this point are all so small that the camera won't focus on them. It's very slow going at this point, but I am getting frustrated with all the cerium oxide in the tank as it's really hard to figure out where the scratches actually are. I may have to bring the hose in and try and siphon it out so that I can get a better sight on where the actual issues are. I would say I could probably stop at this point and be happy but I don't need the tank to be ready to go so I figure I might as well continue polishing it as best I can.


One last reminder / disclaimer... sanding glass is dangerous. The glass fibers are small and can scratch your throat lining. I have been wearing a mask the whole time while doing this. Working with power tools can be dangerous too. Unfortunately it got the better of me yesterday and the sander jumped when I only had one hand on it (the other was bracing myself up on the tank) and it went right into my palm and sliced open my hand fairly badly. So just be careful if you ever attempt something like this... I still think it's 100% worth it.

I also noticed the bottom of the stand was missing a few cam lock nut's so I ordered a set off amazon. I am thinking about further bracing the stand with brackets but it's probably just overkill.
 

TriggerFan

Guest
Joined
Apr 14, 2019
Messages
584
Reaction score
401
Location
Cypress
Well, I was ready to reply "No half-********* job in here!" until I read your reminder / disclaimer section and that you got hurt. That's no fun. I am sorry about the unfortunate event after all the hard work. Looks like you may still enjoy the tank where it is at if you can't wait until you heal to give it another try.

Good luck and heal soon!
 
OP
OP
Tenny

Tenny

Supporting Member
Build Thread Contributor
Joined
Jul 18, 2018
Messages
755
Reaction score
588
Location
League City
Thanks guys, it is definitely is paying off. Despite the injury I have continued on. I just wear a glove while working on it to keep any debris from getting close. I think the next goal is to just clean out the cerium oxide to see where I am really at.

The live rock is in a water bath with a Dechlorinator.

Picked up a 40g breeder today ($49 at Petco ($1/G only applies to 29g and smaller). It'll be a tight few weeks for QT for the fish, but in the end it'll be worth it.
 
OP
OP
Tenny

Tenny

Supporting Member
Build Thread Contributor
Joined
Jul 18, 2018
Messages
755
Reaction score
588
Location
League City
Cleaned out the tank of the cerium oxide (also ran out of it while polishing). Realized I need to sand the edges more. Just couldn't see them with all the junk in it. Just seems about a 2" strip around all the edges have minor scratches in them and I'm 100% positive that's from the sanding process. I just didn't continue to go high enough in grit close enough / enough. So I bought more 3" sanding discs and will attack them later this week when I get them in. Then I get to polish them and then the front face will be done.

At least the general front face is all done.

1579628270112.png
1579628291705.png
 

RR-MAN

Supporting Member
Joined
Aug 18, 2003
Messages
5,691
Reaction score
1,222
Location
Pearland
Impressive progress [emoji106][emoji106][emoji106]

Looks really good !
 

Sondra

Supporting Member
Joined
Oct 1, 2019
Messages
84
Reaction score
66
Location
Nederland, Texas
Very nice!! I was looking at that tank pretty hard. You have done an awesome job, it's gonna be beautiful!!
 
OP
OP
Tenny

Tenny

Supporting Member
Build Thread Contributor
Joined
Jul 18, 2018
Messages
755
Reaction score
588
Location
League City
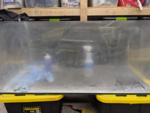
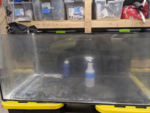
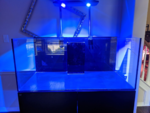
Summary: Well I am done with the tank polishing. I thought I was done the other day but when I cleaned it out I noticed problems so I went back to polishing. Yesterday I went and helped a friend change a timing belt and came back to more polishing. Finished it up and my neighbors son was there so I had him help me carry it into the house. Of course I noticed two small issues that honestly probably no one will see. So I am going to roll with it since getting help to move the tank in and out is hard for me.


Back to polishing:
1580135955679.png

Am I done? Nope...
1580135984557.png


Now I am done...
1580136178146.png
1580136199592.png
1580136212735.png
 
Top