• Welcome back Guest!

    MARSH is a private reefing group. Comments and suggestions are encouraged, but please keep them positive and constructive. Negative threads, posts, or attacks will be removed from view and reviewed by the staff. Continually disruptive, argumentative, or flagrant rule breakers may be suspended or banned.

tas5tas' 237g Total System Build (1 Viewer)

Users who are viewing this thread

Status
Not open for further replies.
OP
OP
T

tas5tas

Guest
Joined
Mar 23, 2007
Messages
753
Reaction score
0
Location
Lumberton, TX
I was able to prime the bottom portion of the stand last night and today, so I'll post pictures tomorrow once it is dry.
 
OP
OP
T

tas5tas

Guest
Joined
Mar 23, 2007
Messages
753
Reaction score
0
Location
Lumberton, TX
Here are some pics of the stand primed/sealed. Now I can start skinning the stand and prime/seal them to be painted.

stand7.jpg


stand8.jpg


stand9.jpg
 
OP
OP
T

tas5tas

Guest
Joined
Mar 23, 2007
Messages
753
Reaction score
0
Location
Lumberton, TX
Build has been delayed for a while. Battling a horrible abscess tooth and will have the tooth removed(hopefully monday) once the swelling and infection subsides. Went to the dentist on monday and they put me on some antibiotics. I just haven't had the will power to do any work through all of the pain. My right cheek/jaw is swollen to about the size of a softball. Will try to get some work done this weekend if I can. The antibiotics seem to be helping somewhat as most of the pain has subsided today. I'm still shooting for a completion date of 1/1/2009.
 
OP
OP
T

tas5tas

Guest
Joined
Mar 23, 2007
Messages
753
Reaction score
0
Location
Lumberton, TX
I was able to get a little help today so I decided to skin the bottom of the stand. I will prime/seal either tonight or tomorrow....my tooth is still killing me. Luckily I go to the dentist monday. Here are the pics....

stand10.jpg


stand11.jpg


stand12.jpg


stand13.jpg


stand14.jpg


stand15.jpg
 
OP
OP
T

tas5tas

Guest
Joined
Mar 23, 2007
Messages
753
Reaction score
0
Location
Lumberton, TX
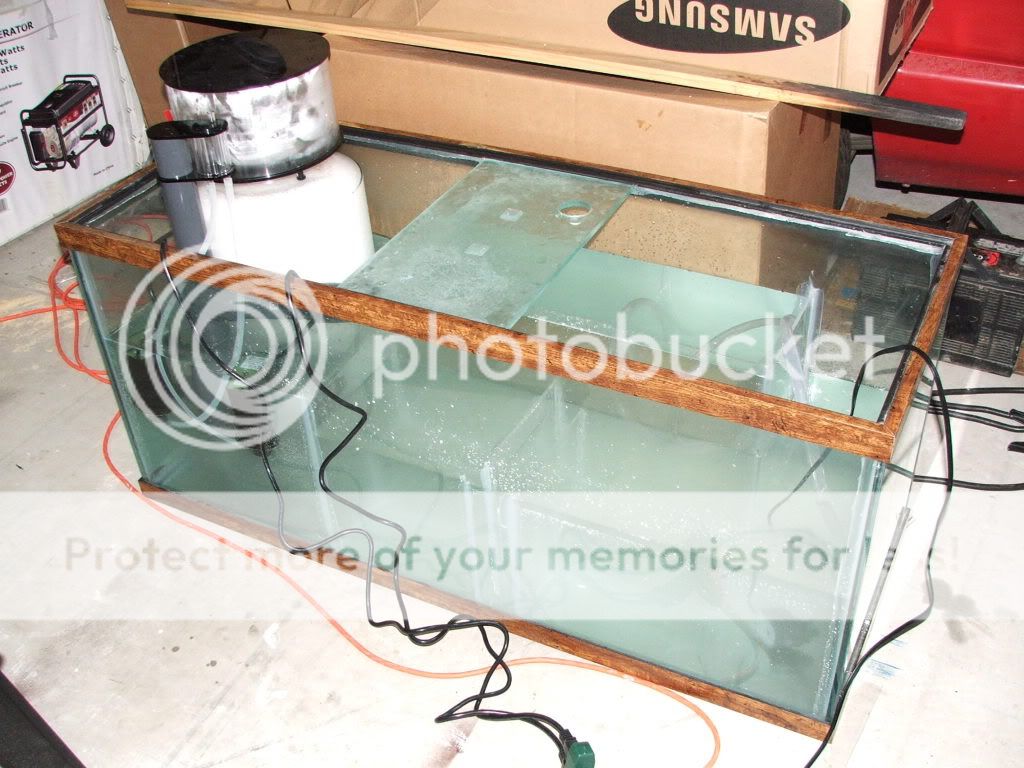
I finally got around to leak testing the sump and the baffles I put in. I figured it would also be a good time to fire up the new skimmer and give it a nice freshwater and vinegar bath to help start the break in period. I'll let it run like this until I'm ready to leak test the entire setup.

Here's the pics.....

sump8.jpg


sump9.jpg


sump10.jpg


sump11.jpg


sump12.jpg
 
OP
OP
T

tas5tas

Guest
Joined
Mar 23, 2007
Messages
753
Reaction score
0
Location
Lumberton, TX
I also ordered my 3/8" acrylic rod from Tap Plastics today so I can get started on my aquascaped ASAP. All rockwork will be elevated off the floor of the tank since it will be barebottom. I got the idea from RC tank of the month a couple of months ago.
 

hank

Guest
Joined
Oct 14, 2007
Messages
630
Reaction score
0
Location
Pearland
Looks like fun.

I also think the return is way too small, I'd double it twice. Dwell time makes no sence, there is going to be a certain amount of junk in the water regardless- either your skimmer and fuge can keep up or not.
 
OP
OP
T

tas5tas

Guest
Joined
Mar 23, 2007
Messages
753
Reaction score
0
Location
Lumberton, TX
Chuck..

My sump is a 75g tank.....I don't know how wise it would be to remove the brace...especially since it holds 45g of water at all times. I did drill a hole for a 1" bulkhead through the brace today though for the drain that will feed the refugium.
 
OP
OP
T

tas5tas

Guest
Joined
Mar 23, 2007
Messages
753
Reaction score
0
Location
Lumberton, TX
Here is a few pictures of what I've been working on the past few days....

I still need to prime the bottom part, but I figured I would wait to do that until I finished the top/canopy part so i could just prime everything at the same time.

stand16.jpg


stand17.jpg


stand18.jpg
 
OP
OP
T

tas5tas

Guest
Joined
Mar 23, 2007
Messages
753
Reaction score
0
Location
Lumberton, TX
Thanks.....I still have plenty of work to do. I have decided though that I'm going to get everything primed and then move it into the house, setup the tank and let it begin it's cycle. I will paint it and add the trim while the tank is setup and going through it's cycle. My acrylic rod will be here tomorrow and I plan on working on my aquascape some this weekend. I'm still trying to figure out how to mount my VHO actinics to where they will be just below my lumenbrights but not protrude into the reflectors too far........I knew I should have just bought a 180g tank then I wouldn't have this issue. Oh well.....I'll make it work and will make it look right in the process.
 
OP
OP
T

tas5tas

Guest
Joined
Mar 23, 2007
Messages
753
Reaction score
0
Location
Lumberton, TX
The weather has been horrible here the last few weeks so I'm still waiting to finish priming the stand and canopy before cutting the doors and moving everything inside for setup. I was able to get my lights measured up, hung and tested though over the last few days. I still haven't fired the VHO actinics yet though. Here are a couple of pics of the lighting test....the first three are with a custom white balance that I set....and the last three are with the camera set to auto. The true color is really somewhere in between the two white balance settings.

stand24.jpg


stand26.jpg


stand27.jpg


stand20.jpg


stand28.jpg


stand29.jpg
 
OP
OP
T

tas5tas

Guest
Joined
Mar 23, 2007
Messages
753
Reaction score
0
Location
Lumberton, TX
I've gotten alot of work done recently. I've almost completed the aquascape. I've started gluing plumbing fittings and bulkheads. I was able to cut the doors from the bottom of the stand. I brought the entire assembly inside to it's final resting place just to see how big this thing is. WOW it's HUGE!!! I mounted all my equiptment in the stand including the sump and 20g topoff tank. I ran electrical up above all equiptment inside the stand. I was able to pick up a DC4HD for my controller to seperate my lights from the other electrical also. I still need to prime where I cut the doors, cut the doors out of the canopy, finish priming the bookcases, buy the trim for the doors and facing of the display, and paint the final color......still undecided. Here are some pics.........

rock1.jpg


rock2.jpg


rock3.jpg


rock4.jpg


aquascape1.jpg


aquascape2.jpg
 

bcallahan

Guest
Joined
Jan 2, 2008
Messages
118
Reaction score
0
Location
Midtown
Very nice setup. I like the under-tank planning for your sump and electrical.

I also used acrylic rods in my aquascaping and just re-scaped and re-set up my tank a few weeks ago after a Ike-induced wipeout. One thing that stumped/frustrated me was creating places for coral higher in the tank while keeping to a minimum the rocks touching the sand. If you just drill the rock and stack it, it ends up looking like a snowman/stoplight and there are few places for corals. (My tank is a 140 and the height-width ratio exacerbates the issue). I ended up drilling smaller holes into the live rock and then feeding nylon bands through those holes and then lashing them to the acrylic rod. So I have only three rocks touching the sand but the pillars spread out a little as you go higher before tapering to the top. Can't say I think they look all that great but you can get the idea from the picture below. (the tank was cycling, hence the bit of brown algae on the rocks). It also gives more places for fish to hide. Anywho, you might have had the same issue so thought I'd throw the idea out there if you had a similar issue.

DSC01525-1.jpg
 
OP
OP
T

tas5tas

Guest
Joined
Mar 23, 2007
Messages
753
Reaction score
0
Location
Lumberton, TX
No sand in my display........going to be barebottom. That's the reason I used the acrylic rod to lift the rock. I still have a little bit of aquascaping to do yet, but will finish it once the tank is setup with water and I can evaluate the flow. Also, I was able to get all the bulkheads installed the other day and setup and leak test the display in the garage. NO LEAKS!!! YEA !!! Hopefull my new filters and DI resin will be in next week so I can setup the tank and get it cycling.
 
OP
OP
T

tas5tas

Guest
Joined
Mar 23, 2007
Messages
753
Reaction score
0
Location
Lumberton, TX
I know that I am currently 2 weeks behind my self imposed schedule, but I was able to finish all plumbing today and i started filling the display up around 11:00pm. My ro unit is producing pretty slow right now since ground water temps are still low, but I hope to have everything filled in 40 hours or so. I will post pictures tomorrow of the finished plumbing and overflow boxes I made from $7 mailboxes.


On a side note......how many people are running Zeomag in combination with ARM or GenX media in their calcium reactor?? I have the coarse ARM and was thinking about getting some Zeomag to throw in there as well to keep magnesium levels elevated. I probably won't bring the calcium reactor online though until I have my corals moved over after the tank cycles......same goes for the carbon and phosban reactors as well.

I have decided to run absolutely NO SAND at all anywhere in the system. The refugium will only have small live rock pieces, rubble, and chaeto. I'm hoping that my skimmer will be able to keep the nutrients and nitrates at bay since it is rated for 300 gallons and I'll only have about 235 gallons total once I build my Gulf of Mexico species only tank on the side of the canopy.

Let me know how eveything looks. Everyone's input is greatly appreciated and taken into consideration.
 
Status
Not open for further replies.
Top