• Welcome back Guest!

    MARSH is a private reefing group. Comments and suggestions are encouraged, but please keep them positive and constructive. Negative threads, posts, or attacks will be removed from view and reviewed by the staff. Continually disruptive, argumentative, or flagrant rule breakers may be suspended or banned.

A Newcomer's 75g In-Wall Build (1 Viewer)

Users who are viewing this thread

Joined
Apr 26, 2010
Messages
112
Reaction score
0
Location
La Porte, Tx
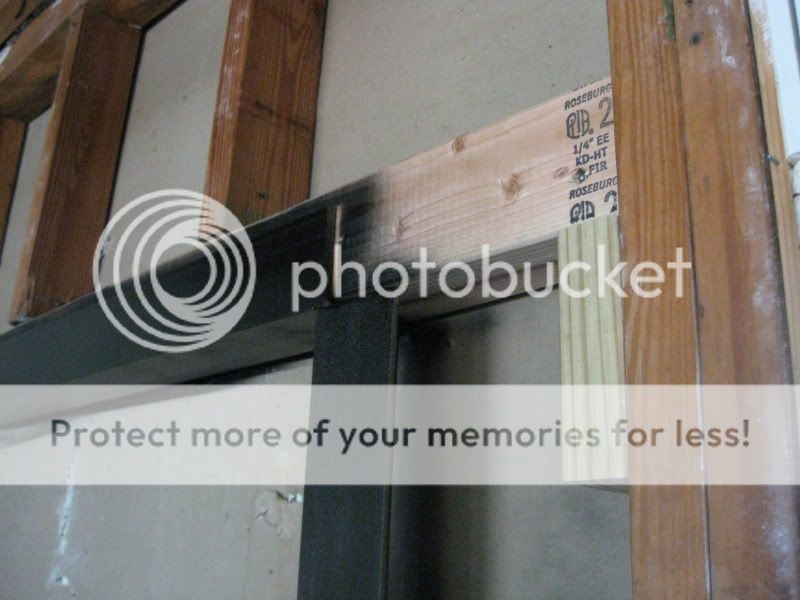
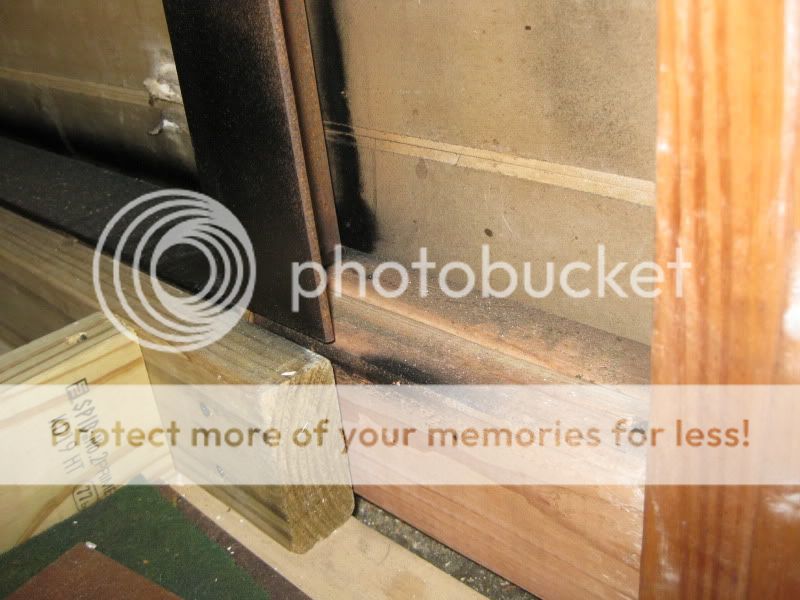
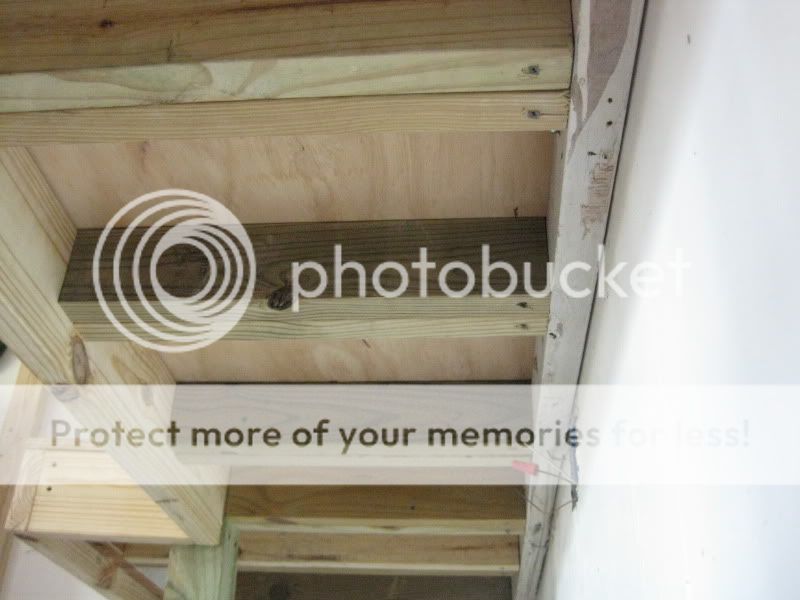
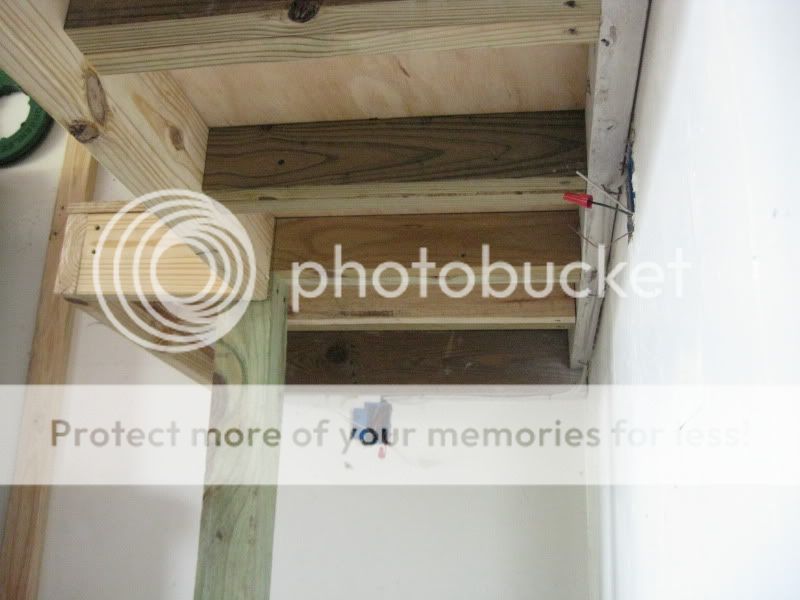
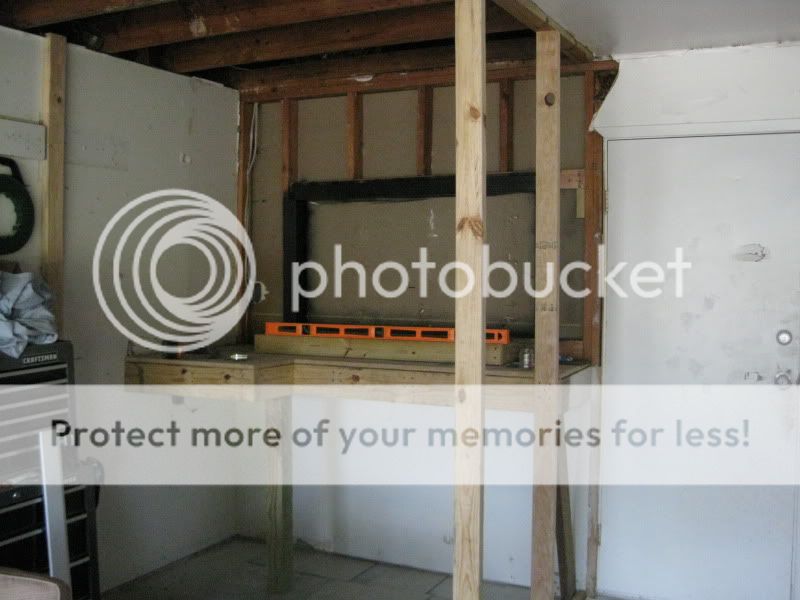
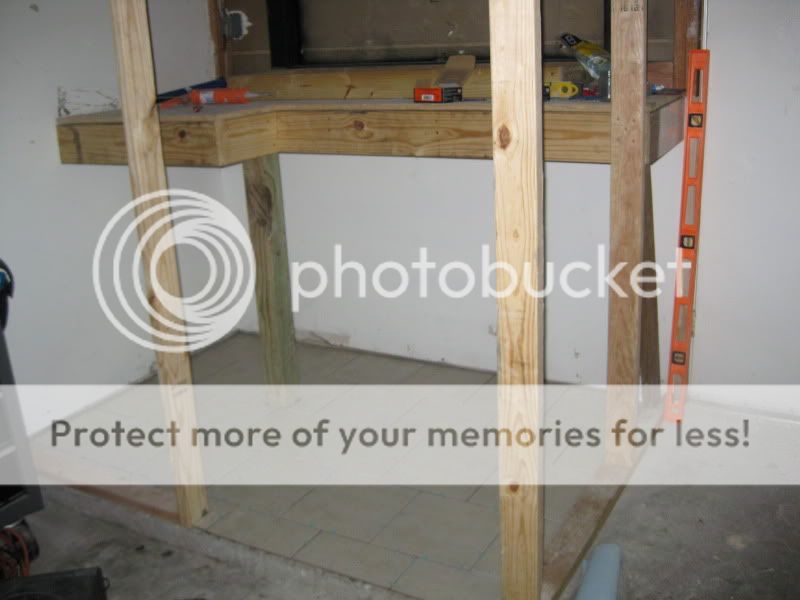
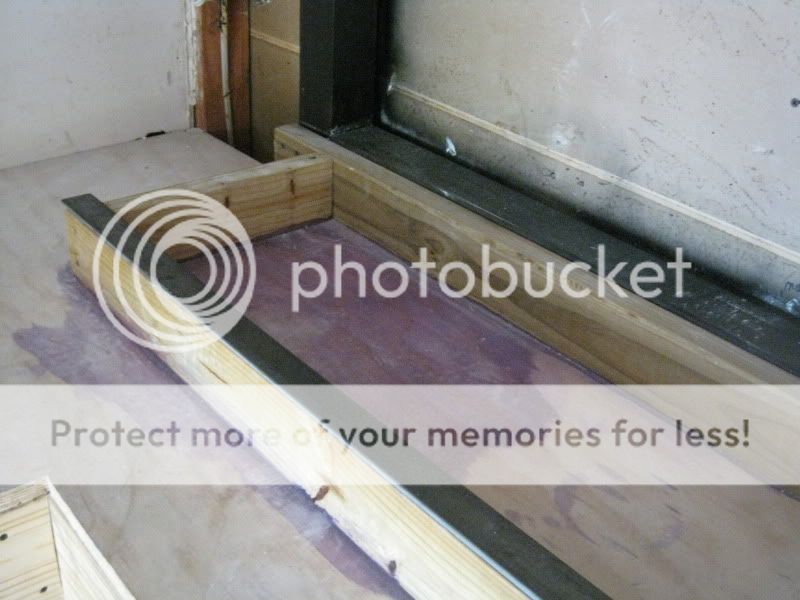
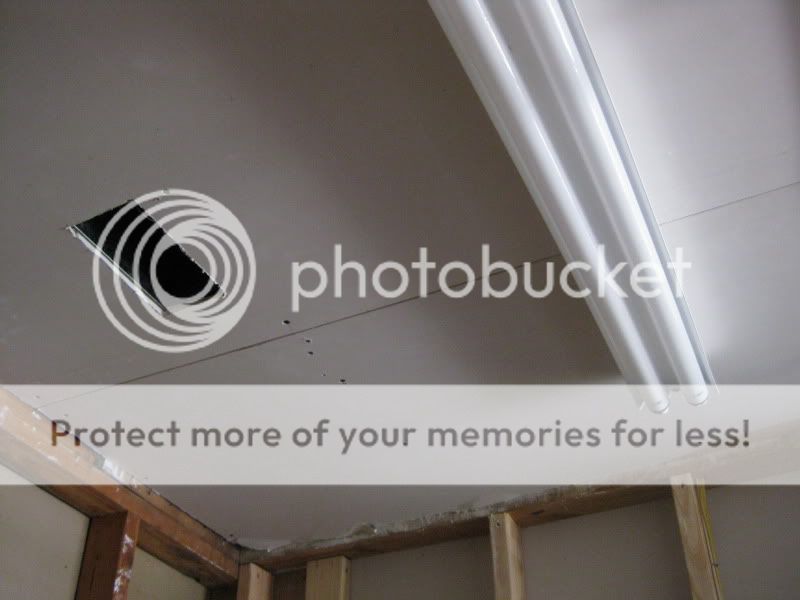
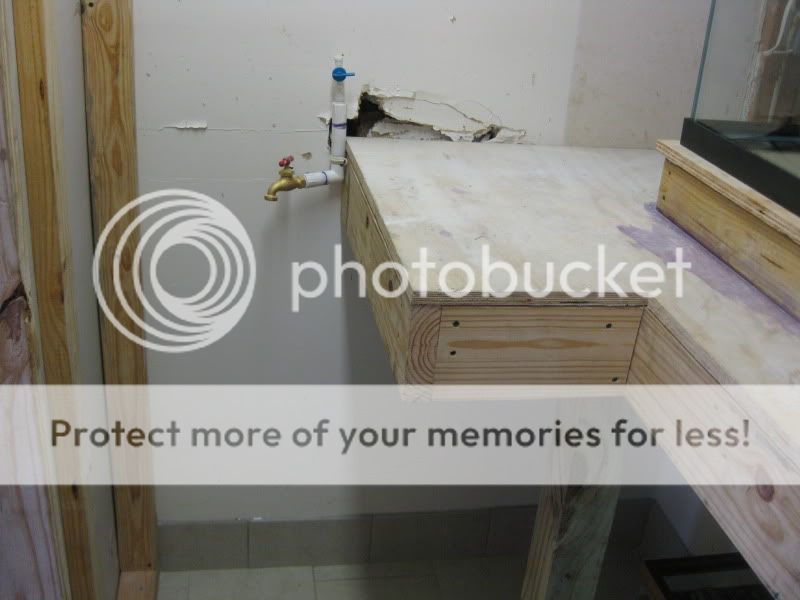
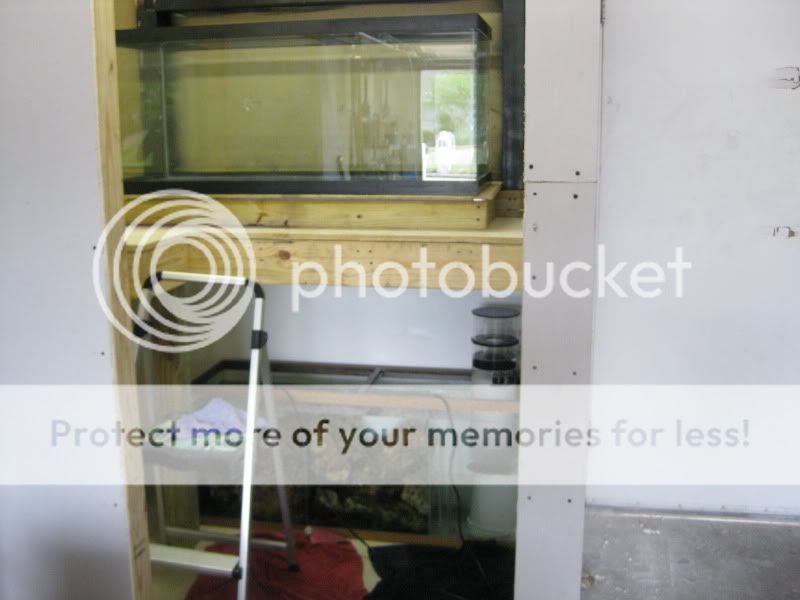
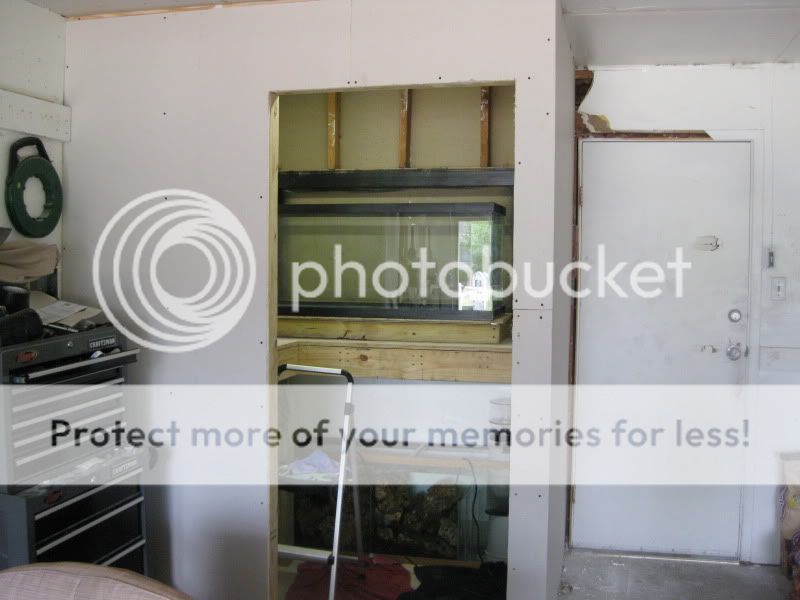
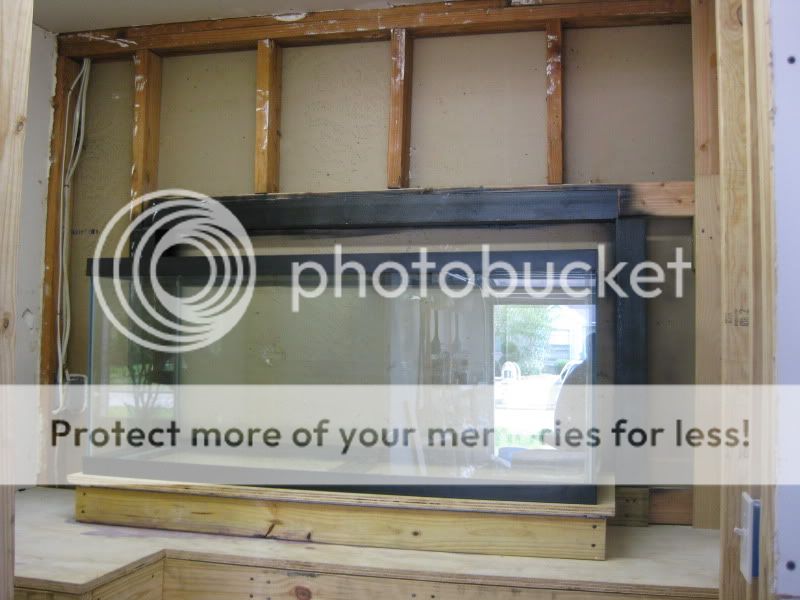
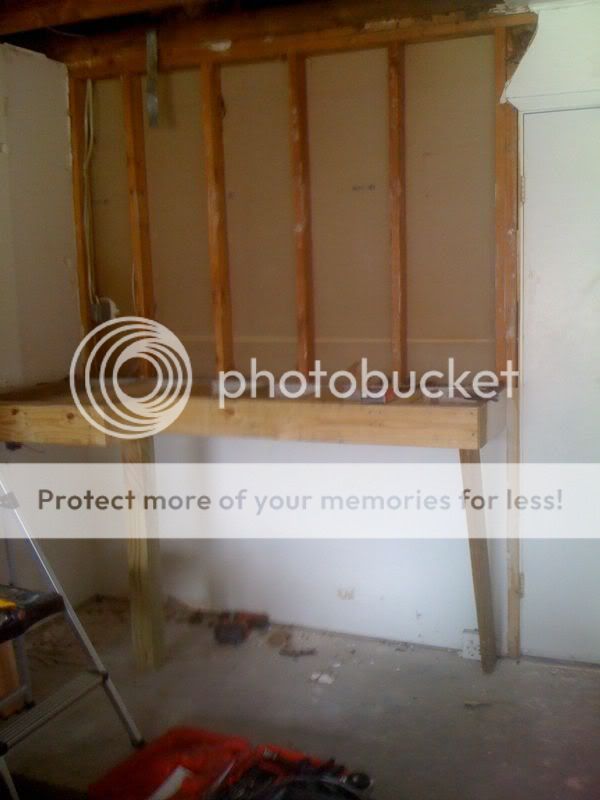
Hi all. I am new to MARSH and just recently took interest in the world of reefkeeping. Until today I hadn't formally introduced myself to the forum but I have been scouring the pages herein for a month or so now learning things from thread to thread, not to mention the tremendous help and inspiration my father in law (cliner) and his awesome 180g mixed reef has lent me. I decided for my first tank I wanted to do a 75g in-wall build in my dining room wall. So far the set-up is as follows:

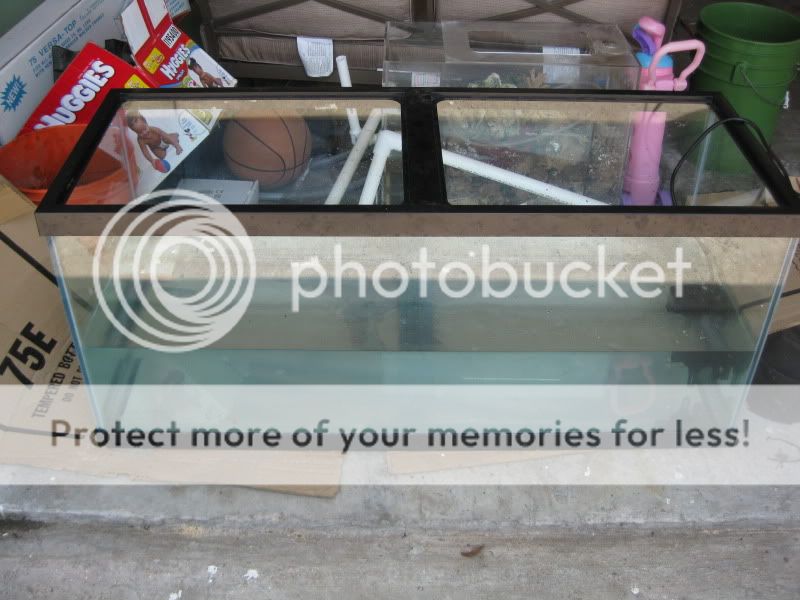
75g AGA tank (will be drilled for custom acrylic corner overflows)

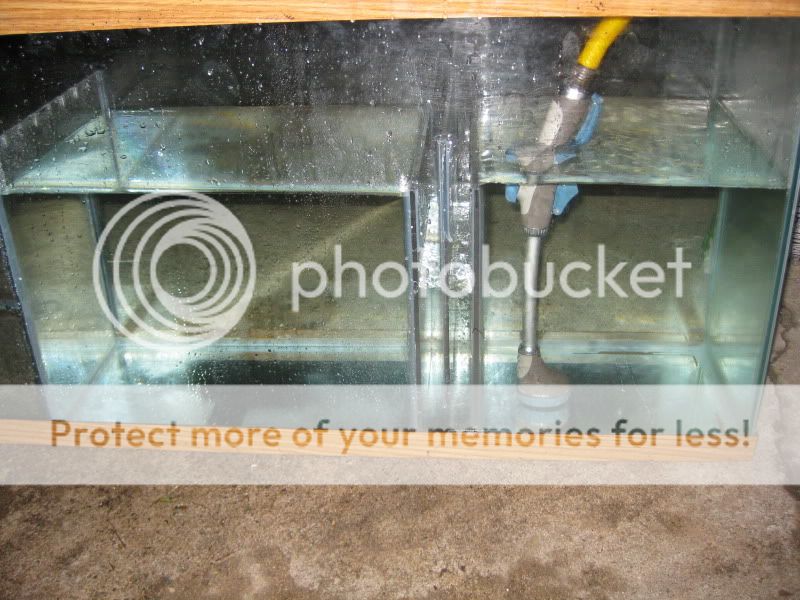
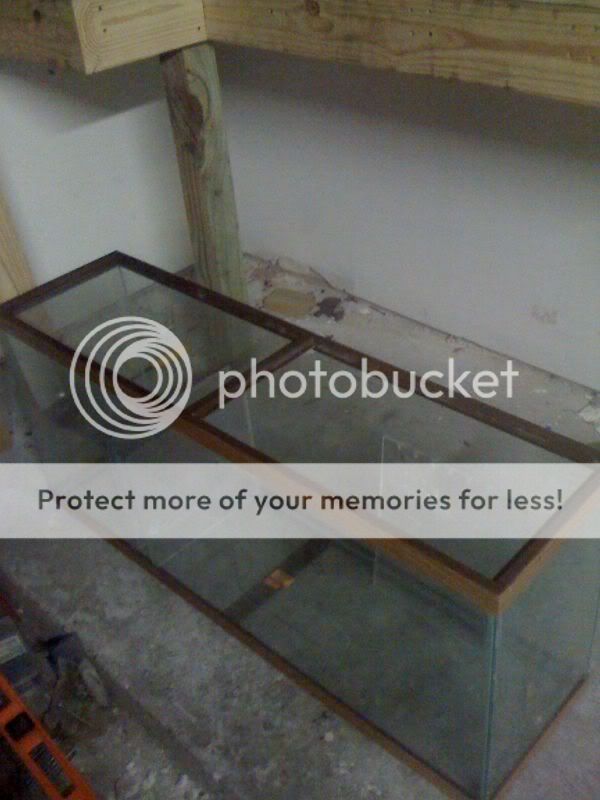
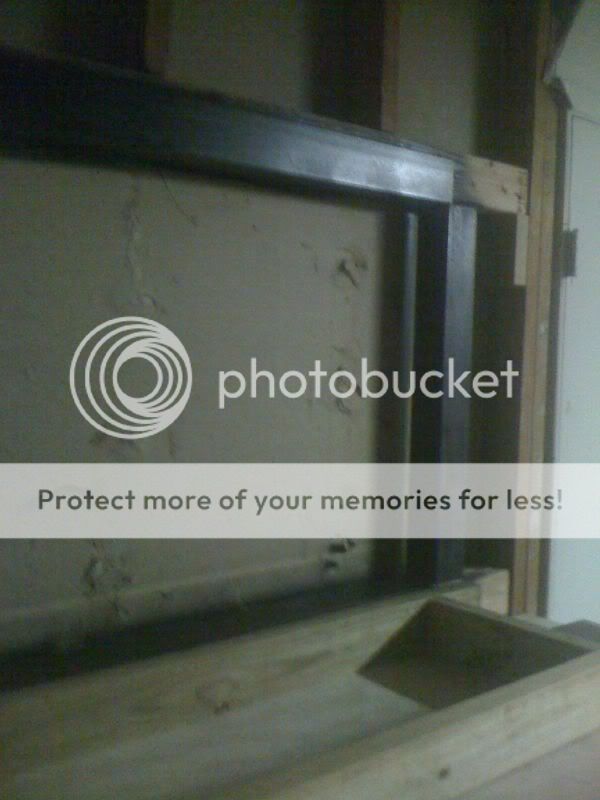
55g DIY glass sump (left to right Skimmer 12x12x12; 1" bubble trap; 18x12x12 return; 16x12x14 refugium)

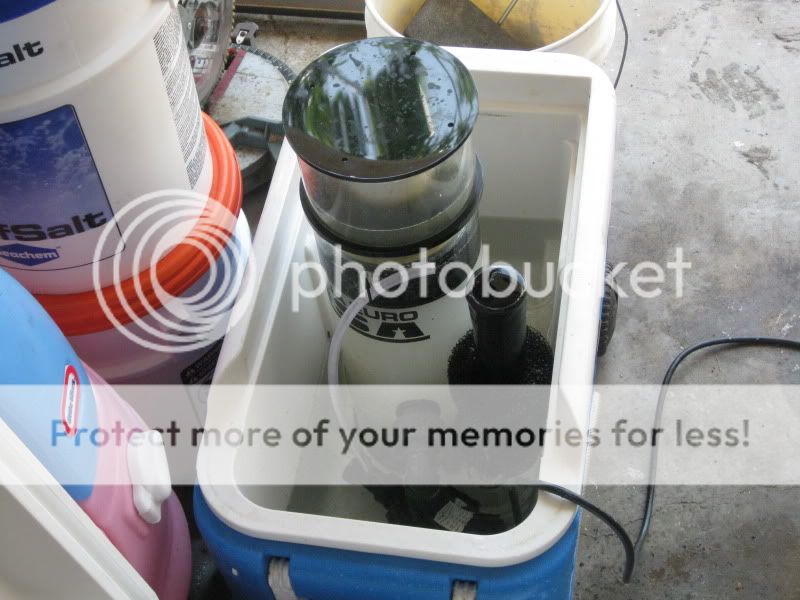
Aqua Euro 135 Skimmer w/ Sedra needle wheel pump

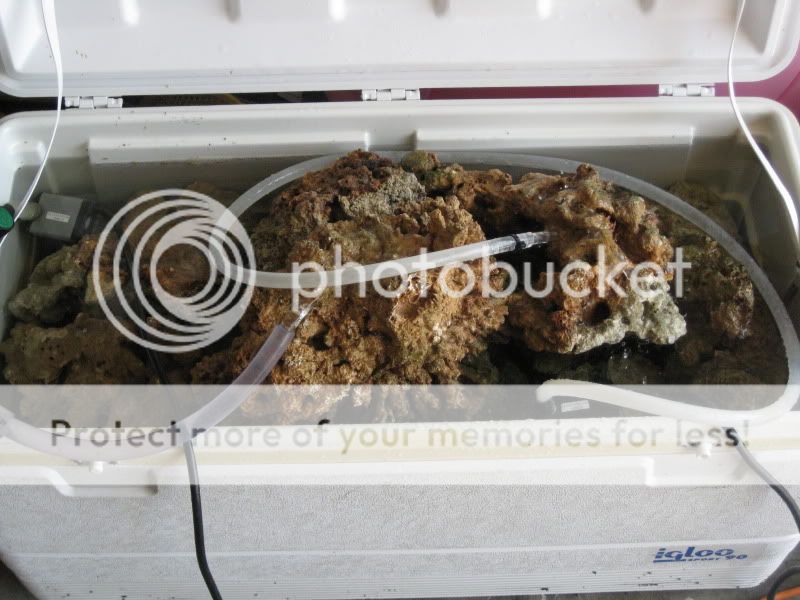
150+ lbs Fiji & TBS Live Rock

I am still debating whether to go with all t-5 ho lights or 2 150w mh and a couple t-5s to supplement actinics. My initial plans were to start a build thread at the beginning but got so caught up in it (I know u know what I mean, lol) I forgot to get pics of the whole process. Never-the-less I am starting the thread now hoping people will get something useful or interesting out of my build... Tonight it is late but I have pics of some progress that I will post when I get up.

Oh and by the way just to introduce myself.... Click Here
[/img]
 
OP
OP
E
Joined
Apr 26, 2010
Messages
112
Reaction score
0
Location
La Porte, Tx
A little background and specifics about my build. My house in La Porte was a bank foreclosure that needed quite a bit of work, so for the last couple of years I have been remodeling the house and getting things the way I want them. The house is old and very much settled so considering that my tank would be going in a load bearing wall I decided to go big with the support. I was lucky to have a neighbor that is a welder and could get surplus metal for little to nothing so I opted to use 3" angle iron to build a frame which will protect my tank from the wrath of my roof incase the double header up top decided to give way.

Here are some pics from my phone that ive managed to dig out of the build up until now.

The wall where the tank will face.
iphone01025.jpg


The back of that wall which is in my garage. I will be building a climate controlled room around my tank as well.
iphone01022.jpg


55g glass sump.
iphone01053.jpg


3"x3"x.25" angle iron frame supporting 2x 2x4 joists on top and bottom. The wall is a load bearing wall in a house that has probably seen better days.
iphone01051.jpg


Will post more pics later on in the day. I will be finishing the sump today and hoping to get the tank base done and start on the framing for the room this weekend. We will see how far I get.
 

cliner

Guest
Joined
Mar 8, 2009
Messages
921
Reaction score
0
Location
The Crosby
How bout some eyes on the bracing, and stand? Anyone see potential issues? The pics don't show the true solidity, but there are 2 2x4's standing up running the length at top and bottom along with the 1/4" steel brace. The stand seems to be strong as well. Share some knowledge before it's too late for this newbie.
 
OP
OP
E
Joined
Apr 26, 2010
Messages
112
Reaction score
0
Location
La Porte, Tx
Lol mike... Definately need some constructive criticism on the bracing. I think it will be enough. I will take pics of the bracing tonight and throw them up asap. The thought of expansion was a definite thought in the design of the build. Unfortunately the size of the wall didn't allow me to brace for a 6' tank but I was, however, able to leave enough space depth and height wise to handle a 120g tall @ 48x24x24. By the tine I outgrow that I will be building a new house taking the in-wall into account pre-construction. For now the metal frame sits at about 46" high and the inner dimensions are 50.5"Wx26"H. The stand is 75"Wx20"D + the 3.5" portion which is supported by the cut off studs and 2x 2x4 joists and will be lag bolted to wall studs on 3 sides and has 1 4x4 support where I felt there was a weak spot. The pics will say more. One thing I will have to do to convert to the 120 is add some additional bracing and build a new tank riser.
 
OP
OP
E
Joined
Apr 26, 2010
Messages
112
Reaction score
0
Location
La Porte, Tx
Here is pics of the bracing and the underneath of the stand. 2x 2x4 cross bracing on the stand, and 2x 2x4 joists just above and below the black metal frame.

This is the 2x 2x4 top joists the metal frame fits into. Screwed in on each side to the full uncut studs on the sides.
iphone01009.jpg


Bottom bracing, same 2x 2x4 joists but these sit across the bottom cut off portions of the three studs that were there.
iphone01008-1.jpg


Bracing underneath tank stand
iphone01010.jpg


Another view of the underside bracing
iphone01011.jpg


I have been making a little headway this weekend. Things seem to be coming together alot like I had imagined which really makes projects like this sweet. lol Gotta love it when it just works.


Heres pics of my progress this weekend.

Sunday morning progress. Set the footers and headers for the frame out, and started framing in studs. Ran out of 2x4's shortly after this pic... lol
iphone01005.jpg


Almost finished with the framing. Will finish that today surely. My wife threw in a hand so we decided to go ahead and get the tile done so I can grout in there and set my sump up to move this rock outta coolers in my garage. All ready for grout.
iphone01006.jpg


Also finished the sump and tested all sections. Sump worls as planned with one hitch. The fuge area being 14" high and having the grooves cut in the baffle, I was pumping water into it with a 250gph pump and it was shooting streams of water that fall into my return and create alot of bubbles and noise. My remedy for this was to install a baffle 2" from the side of the fuge area 6" tall, but the bottom of it would be 6.5 inches off of the bottom of the sump. This would be a vertical piece deisgned to hold a 2"x4" or 2"x6" foam sponge to catch bubbles and quiet the sump. being 6" and sitting 6.5" from the bottom it would stand a total of 12.5" making the water have to travel through the sponge and into the return section even if the return was completely full @ 12". Here is a pic of the finished sump holding water.
iphone01007.jpg


Today I will be finishing the framing, installing the ac addition and running plumbing from a nearby cold water line. I will also try to grout the floor so I can wait for that to cure before I seal and set up my sump. Here are some pics of the show tank the livestock and skimmer that I should have posted a long time ago.

Livestock
iphone01002.jpg


75G AGA Tank
iphone01004.jpg


Aqua Euro 135 thanks to Crawdad!
iphone01003.jpg
 

RR-MAN

Guest
Joined
Aug 18, 2003
Messages
5,687
Reaction score
1,218
Location
Pearland
evolution159th said:
lol... My garage is jam packed full of *carp*...

I meant the front of the tank facing the room (first picture above)...very good location.
 
OP
OP
E
Joined
Apr 26, 2010
Messages
112
Reaction score
0
Location
La Porte, Tx
I thought u may have been talking about that but wasn't sure... I thought it was the perfect opportunity. The garage already had a workbench up against the wall and a 48" tank was the perfect fit. Hence the reason I attempted such a feat so green. It looked like it was going to be simple. Haha. Was I mistaken.

The whole plan started with a 55g tank on a stand in front of that wall. I didn't have a whole lot of room to work with there. Ended up going from 55g Cichlid tank to in wall 75g mixed reef with a room around it REAL fast. When I started I hadn't been aware it was going to escalate to these heights.
 

R-BallJunkie

Supporting Member
Joined
Aug 2, 2006
Messages
1,521
Reaction score
230
Location
Latitude N 8° 43' Longitude E 167° 44' , RMI
your gonna need to sock some money away for a good chiller. a garage tank in texas is tough to do. very unforgiving. you cant go a day without it. if you can swing it, suggest you get a backup, put both on a temp controller, one standard duty at 82-84 normal operations, and one at 85 emergency operation, in case one fails, the other one catches it, and comes on.

looking good so far. cant wait to see your money pit put together.

c
 
OP
OP
E
Joined
Apr 26, 2010
Messages
112
Reaction score
0
Location
La Porte, Tx
Well I do have plans to tie an 8x4 ac vent in to the room as well as having the room sheetrocked etc that should be enough to keep it at bay I'd think. What do u think rr? Really I was trying to get away from having to use a chiller.
 
OP
OP
E
Joined
Apr 26, 2010
Messages
112
Reaction score
0
Location
La Porte, Tx
Been busy with work etc. Have been trying to get liytle things done when possible between family work etc. Laid the tile and threw up 6" tile trim to keep the water in the garage and not in my house. Ran the electrical for the shoplight finished the main plumbing and made sure to spill the PVC primer AND the glue in the process. Will be starting the sheetrok work and hopefully setting up the sump and test fitting the display this weekend. If I can find someone to drill my tank and make me some overflows I can do that this weekend too. I'll have pics either tonight or in the morning.
 
OP
OP
E
Joined
Apr 26, 2010
Messages
112
Reaction score
0
Location
La Porte, Tx
Okay I promised pics and even though I am REALLY late on them here is what I've got...

This is the expertly crafted primer spill on my bench... *sigh* - Shows the 2"x4" tank riser and 1/4"x1.5" steel spacer bars to level out the plywood that will be the level surface for the display tank. The spacer bars will run the entire base of the tank underneath the 3/4" plywood. See pics below.
tankbuild002.jpg


Pic below is the ceiling with 8"x4" AC register box directly over the tank, and a $10.00 shoplight I picked up from home depot. The shop light is mounted closer to the outside of the room to have plenty of room for mounting lights etc.
tankbuild001.jpg


The main plumbing inlet. I have a garden spicket for cold water to my DIY sink that i will either build or find something to customize. Haven't got to that yet. lol The top 1/4" quick disconnect valve is of course for my RO/DI which will most likely mount on the wall close by. Dont mind the humongous hole in the wall.... :banghead2:
tankbuild008.jpg


tankbuild007.jpg


Here is the whole shibang getting closer and closer to completion.
tankbuild003.jpg


tankbuild004.jpg


The sump holding all my live rock and my skimmer. I am cycling the skimmer then will start skimming the bs out of the rocks for a while. I wanted more room and to get those coolers out of my garage.
tankbuild005.jpg


Here is the display tank sitting in place. As you can see I still haven't cut the hole in the sheetrock, and won't until I have the tank ready to stay. I am shooting for this weekend. Maybe...
tankbuild006.jpg


I am getting dimensions for the overflows and still trying to decide if I want to go with diagonal corner overflows the entire height of the back wall or if i want smaller boxes up high and drill the tank high. I dont think I will like the look of the plumbing from the back if it is drilled up high but maybe i wont mind. Even though its the front that everyone is concerned with, I am going to be seeing more of the back probably lol... Something to consider. Another thing I am unsure of is the placement of my return plumbing. I dont really want to hang tubes on my tank for that but rather looking to drill holes to accomodate 1" piping. I am not sure whether I want to run piping through the overflows and out with those pieces that you can point whatever direction you want (like RR tanks have) or just drill somewhere next to it or below it with some sort of deflector on the outlet so I can aim the flow. Anyone have suggestions for this? Pics would be greatly appreciated. Thanks!!!
 

Llama

Guest
Joined
Jul 13, 2009
Messages
1,814
Reaction score
0
Location
SW
If you plan to drill the drain in the bottom of the tank you could just drill another hole for the 1" bulkhead return plumbing. That way you could run your return up and out the top of your overflow.
Then it's just lock-line and an educator to direct flow where you want it. :)

Looks great!!!!
 

FISHSTICK

Guest
Joined
Oct 4, 2007
Messages
774
Reaction score
0
Location
NORTHWEST HOUSTON
evolution159th said:
Hey fishstick. I looked at your build. Your setup is sweet. Props.

Thanks.

You might get away with that air vent if you use good insulation and there is no air coming in from the garage. I would get a chiller just in case. Looking good! :D
 
Top