• Welcome back Guest!

    MARSH is a private reefing group. Comments and suggestions are encouraged, but please keep them positive and constructive. Negative threads, posts, or attacks will be removed from view and reviewed by the staff. Continually disruptive, argumentative, or flagrant rule breakers may be suspended or banned.

DIY LED Light project for my 220 (3 Viewers)

Users who are viewing this thread

OP
OP
T

thereefranch

Guest
Joined
Mar 3, 2007
Messages
23
Reaction score
0
Location
Cypress
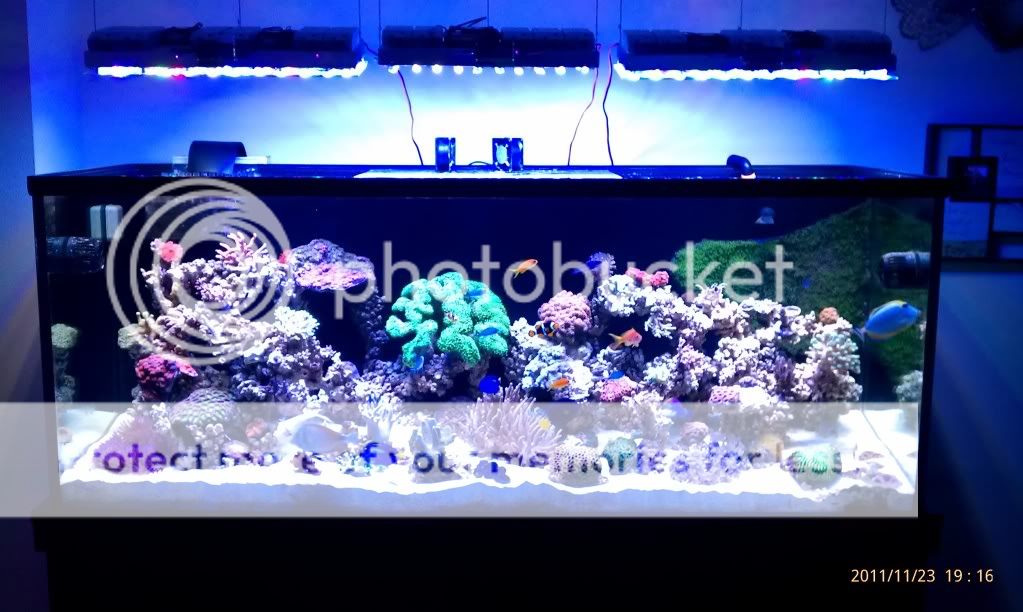
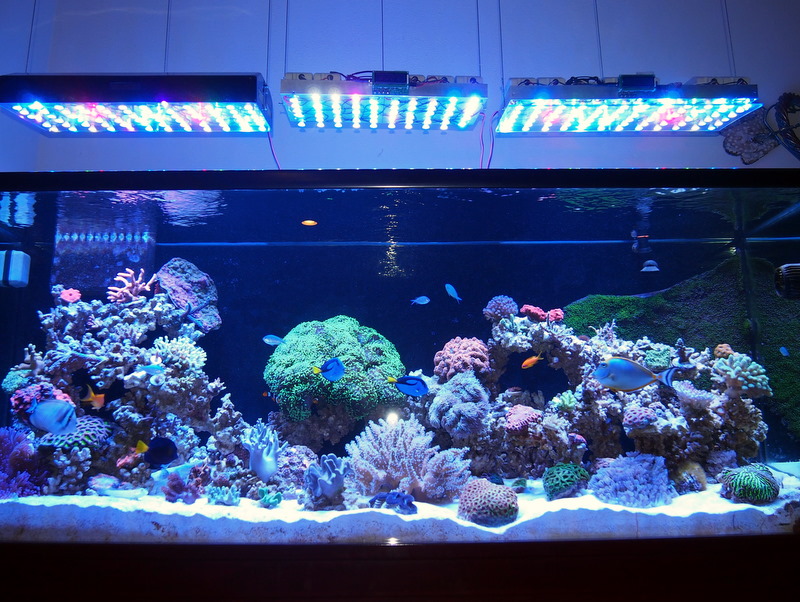
Here are some shots of (3) - Fixtures for the main display tank.
IMAG0690.jpg

IMAG0692.jpg


They break down like this:

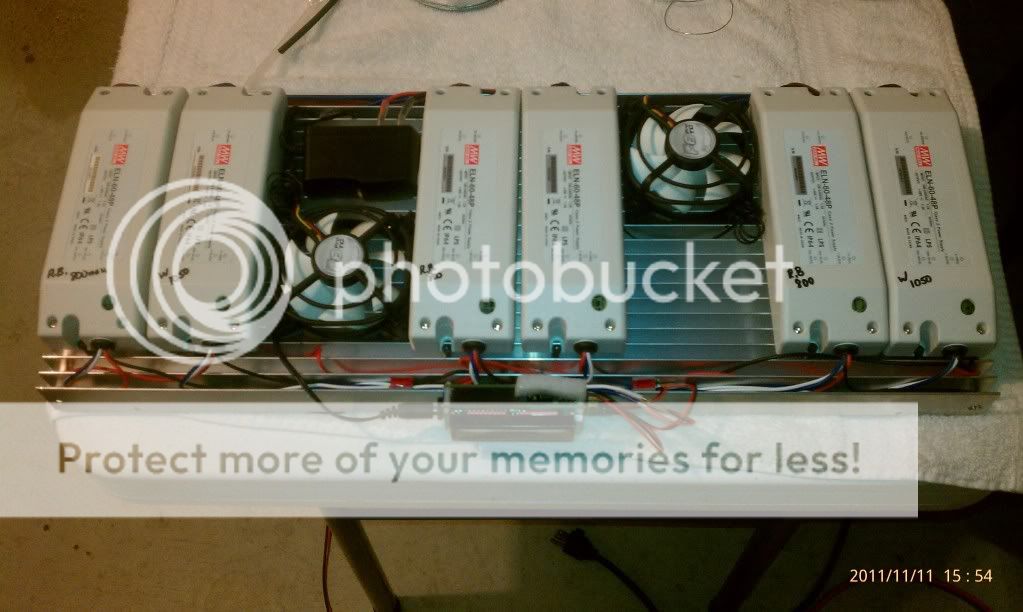
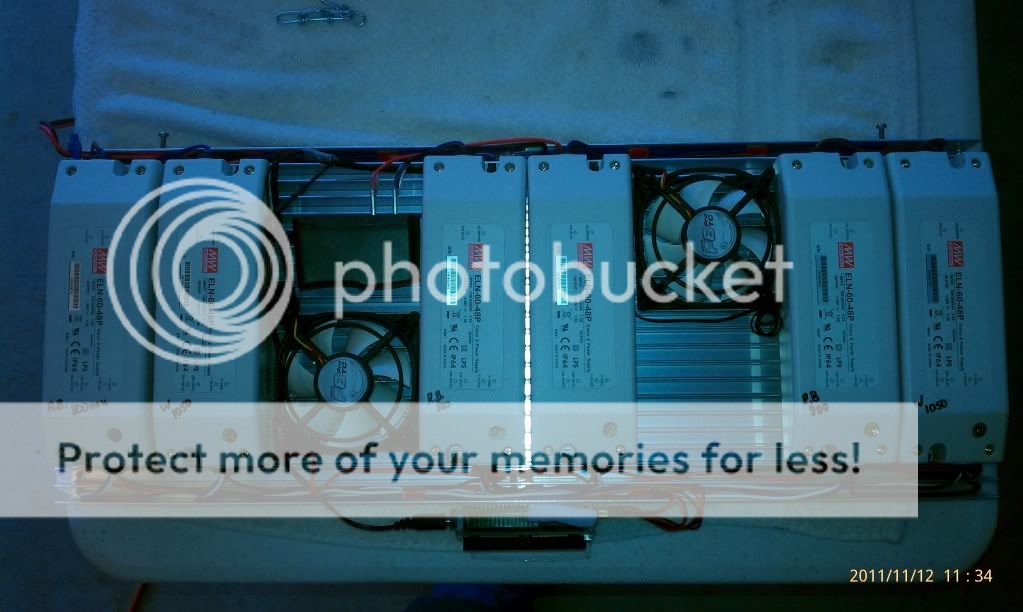
Left and right fixtures:
1 - 8.5" x 22" Heat Sink
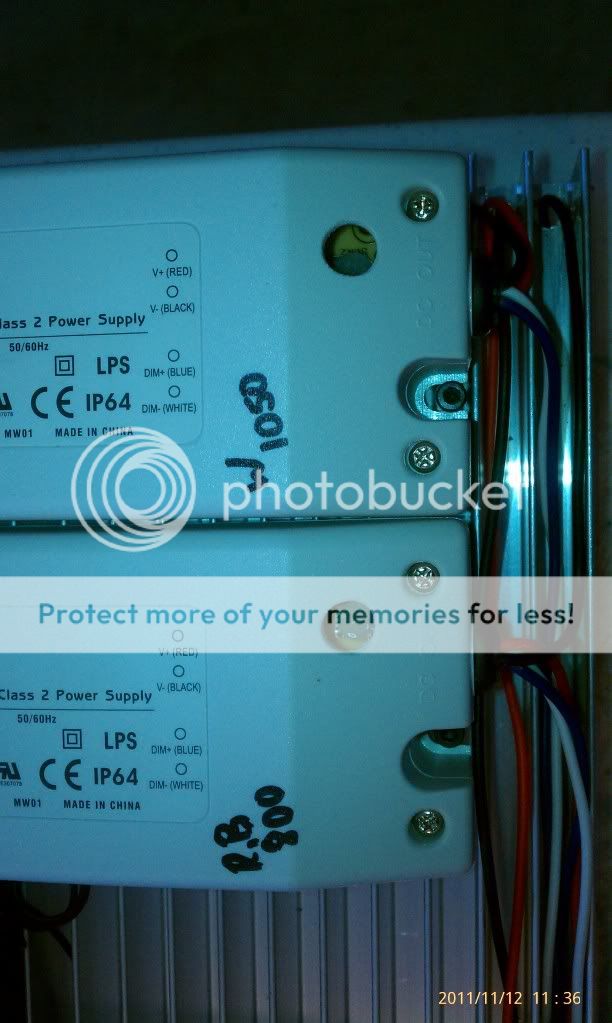
6 - Meanwell Drivers
2 - 80mm Arctic Fans
6 - Blue (mixed string)
2 - Red (mixed string)
2 - Green Mixed string)
2 - Violet (mixed string.... all mixed strings are on the same driver - 12 leds total)
24 - CW (2 strings of 12)
36 - Royal Blue ( 3 strings of 12)
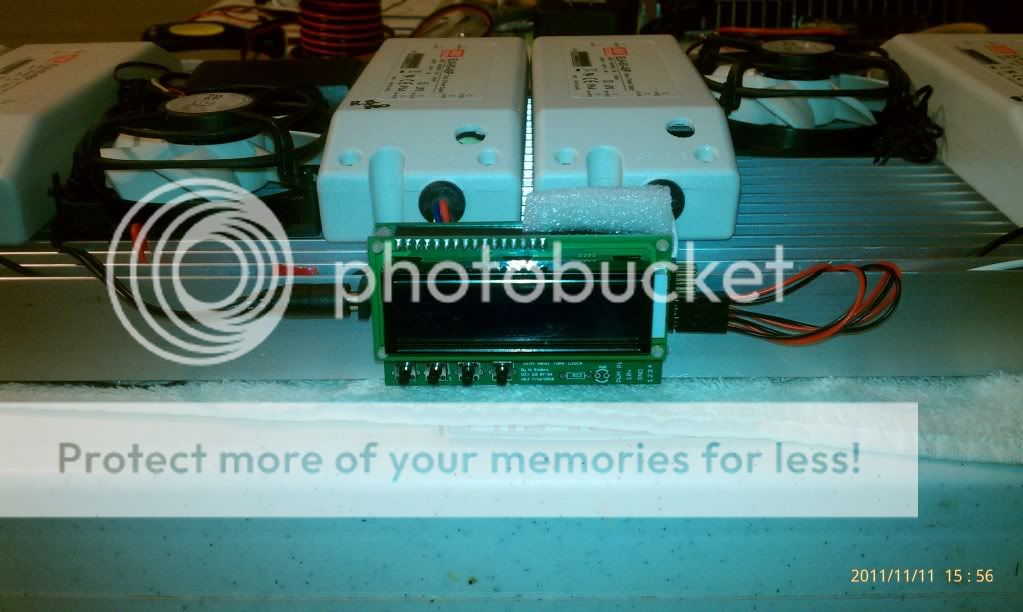
1 - Boostled Controller (best $55 I spent)
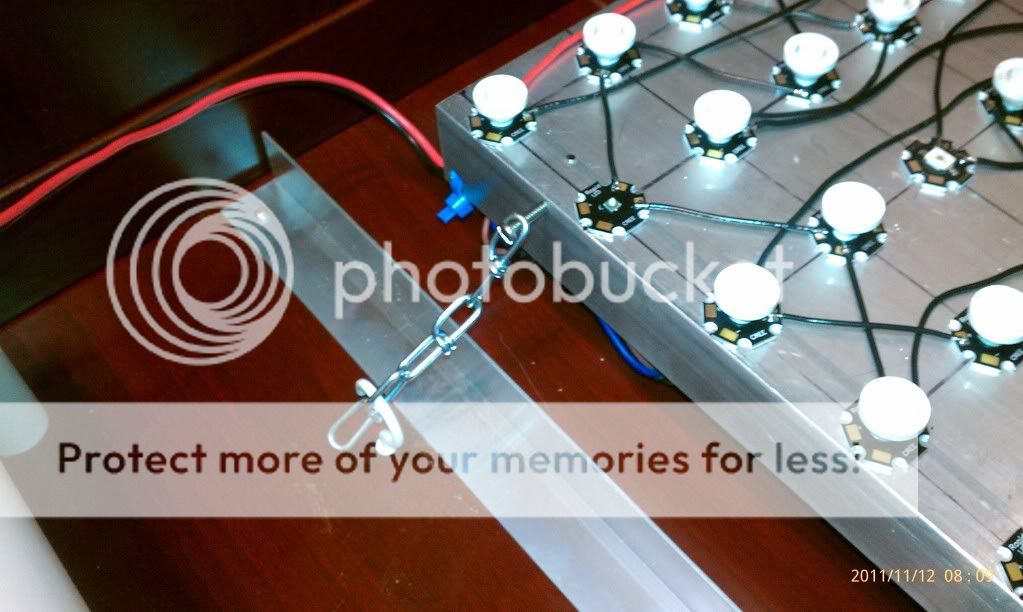
6 - 1/4" x 3/4" Standoffs
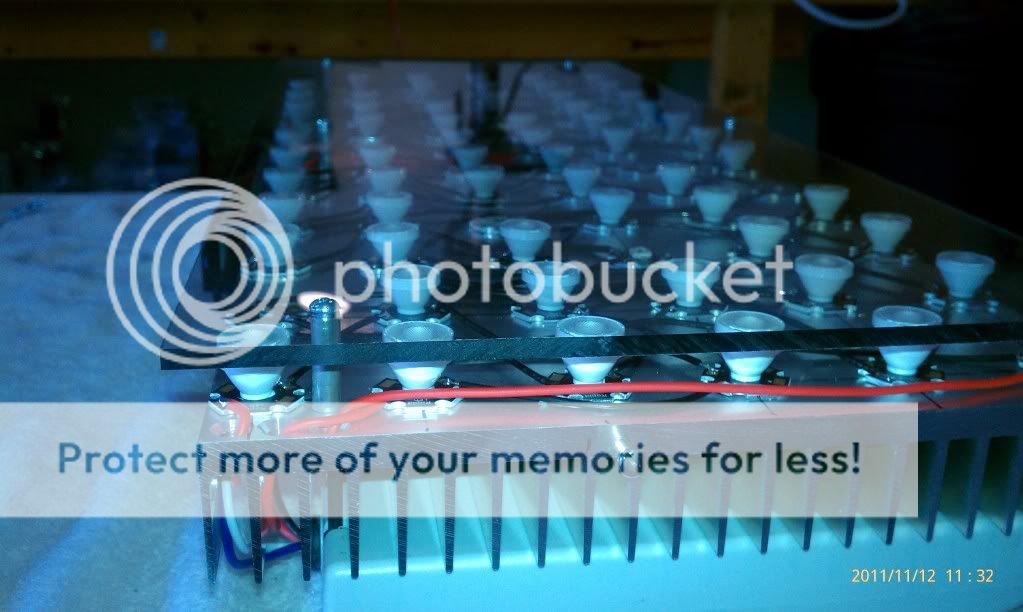
1 - 9" x 23" x 3/16" Lexan Sheet

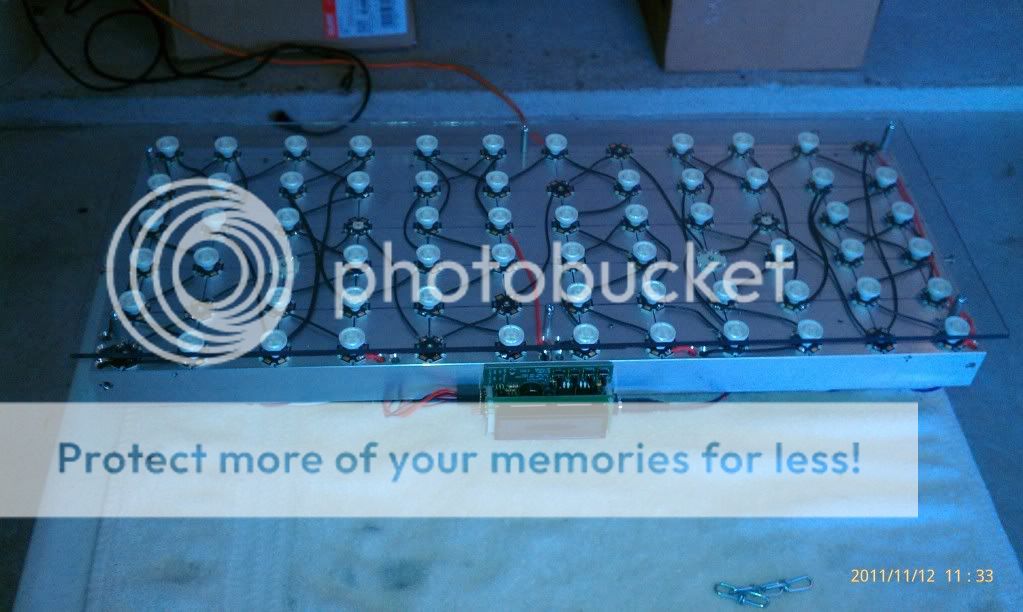
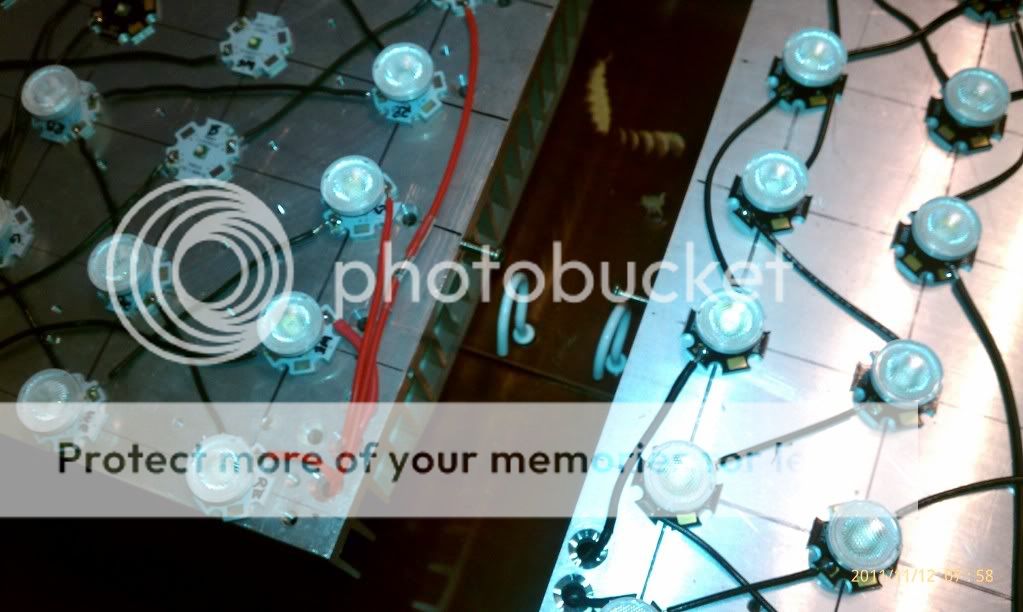
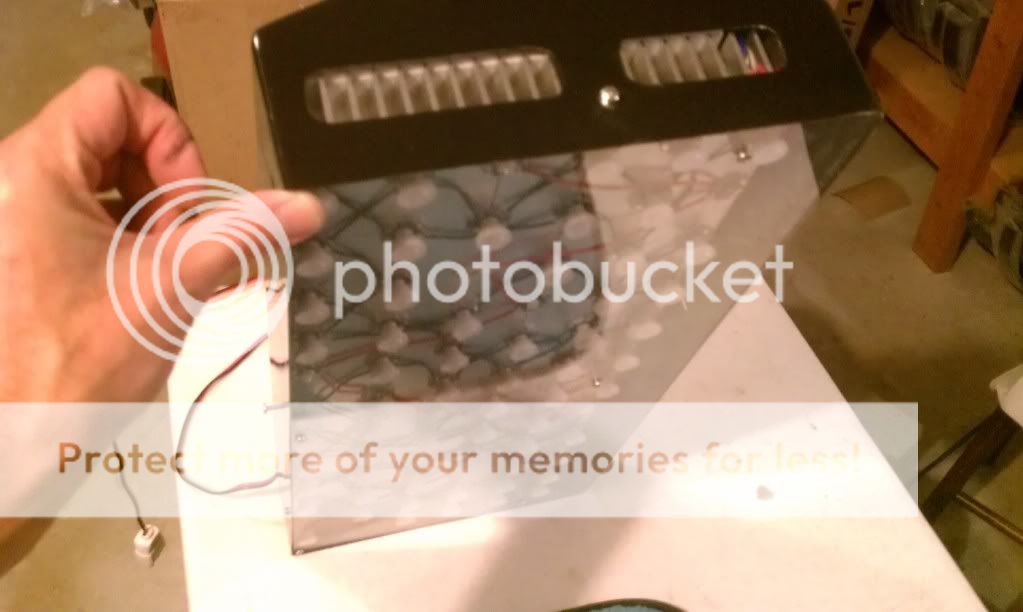
72 total crees per fixture.... The 36 Royal Blue are distributed in strings that cover the heat sink left to right in thirds. This makes them able to be turned on from left to right, or vise versa. The 24 white leds are grouped left to right in half. Meaning that 12 whites are on the left half of the heat sink and the other 12 whites are on the right side of the heat sink. The mixed string runs the length of the heat sink from left to right. All have optics but the mixed string. I like the broader spread for the other colors. That way your not spotlighting red or green in one spot. In the end, this worked well.

The Whites are driven at 1050mah, all others at 800mah. Optics are 80 degree. Fixtures will be 8" off water at about 8-10 degree angle toward the back.

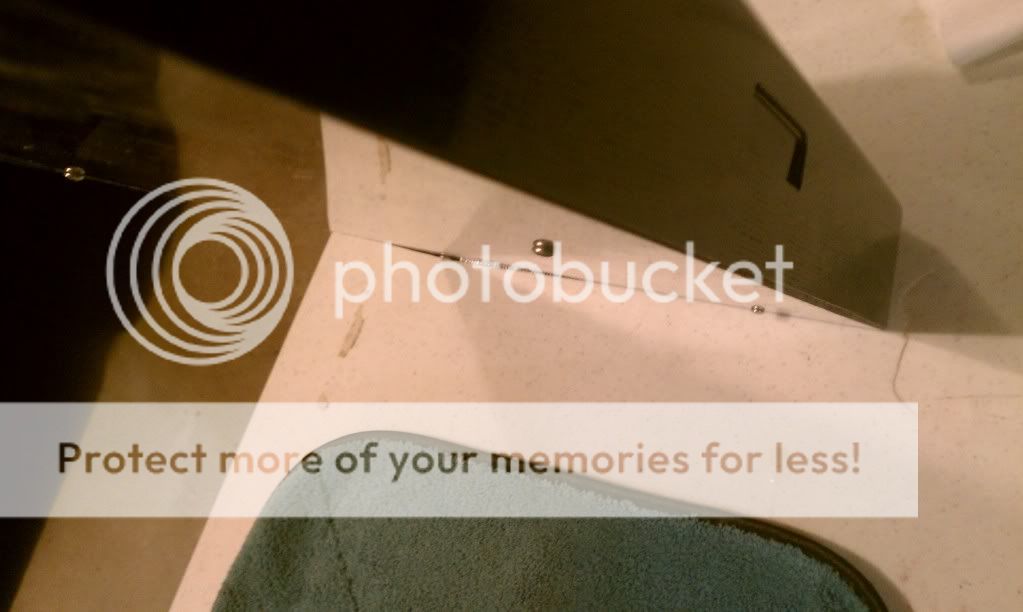
I used Very High Bond double sided tape to affix the controller to the heat sink. The tape is about 1/8" thick so it insulates the back of the controller from the aluminum heat sink. I know....your saying how strong can that be..... well, i bet I could puck the fixture up by the controller!! I cleaned the heat sink with acetone before I stuck it there......and it really is stuck. 3M is one bad*** tape maker!

Since there are 6 drivers and the Boostled controller has 4 channels, I grouped 2 strings of 12 to the same channel. There are (2) - Royal Blue stings on one channel. The other RB and the mixed are grouped. And the whites are on their own channels each. Makes 6 drivers on 4 channels. I'll explain later why they are grouped such.

There is room in the mixed string to add UV leds, so I'll explore that option. ( I can take a blue or 2 out). And the additional colors can be seen at the bottom of my tank (30") without optics.
IMAG0711.jpg


I did not drill and tap these, I glued them. Much easier. And YES, they come off. A straight razor blade will pop them right off. And then use the razor blade to gently scrape the epoxy off either the heat sink or the star. Then re-glue wherever...... really the way to go.

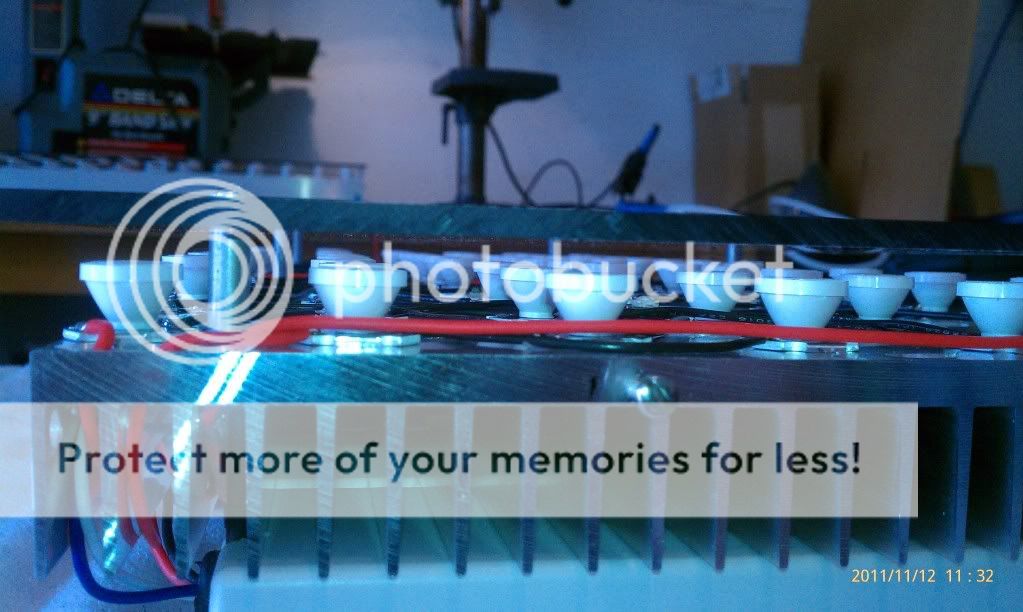
The Splash Shield was really a breeze. I used a table saw and cut the pieces. I drilled and tapped (6) - 6-32 holes in the face of the heat sink on the corners and in the middle on the edge. I used 1/4" electronic standoffs that are 3/4" tall. It puts the shield about 1/4" or so away from the optics.
IMAG0706.jpg

IMAG0707.jpg


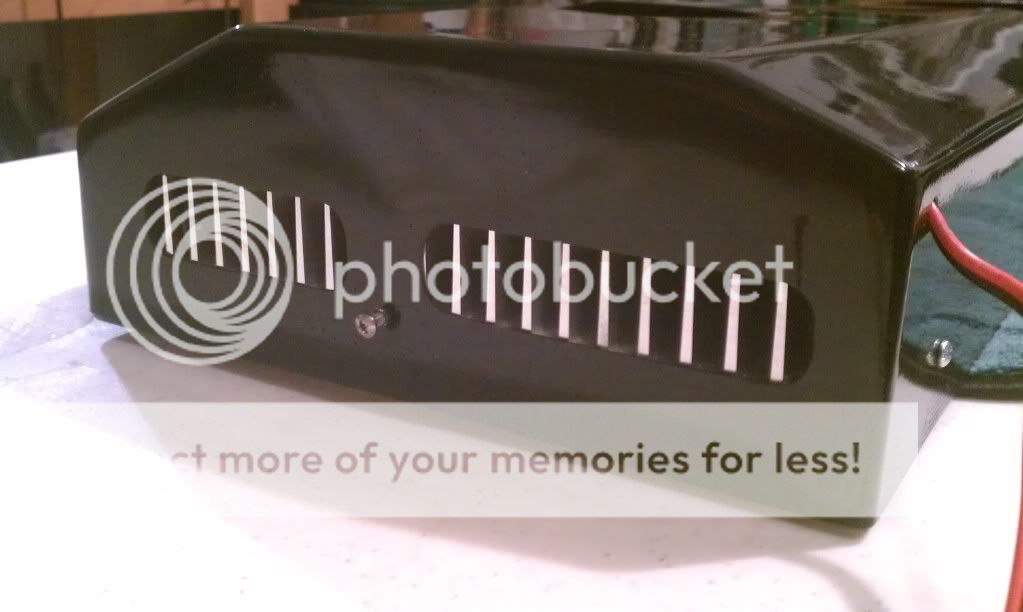
Since the Meanwell Drivers have to be adjusted before you use them, I drilled 3/8" holes in the driver case covers to be able to adjust them. Makes it a sinch.
IMAG0719.jpg


Middle Fixture:
1 - 8.5" x 20" Heat Sink
5 - Meanwell Drivers
1 - 120mm Arctic Fan
6 - Blue (mixed)
2 - Red (mixed)
2 - Green (mixed)
2 - Violet (mixed)
24 - Cool White
24 - Royal Blue

1 royal blue string and the mixed string are grouped. All others have their own channels on the controller. I didn't use a shield on this one because it is over the center glass brace in my tank. I most likely will add one in the end because it protects the optics and the fixture is much easier to handle.
IMAG0700.jpg

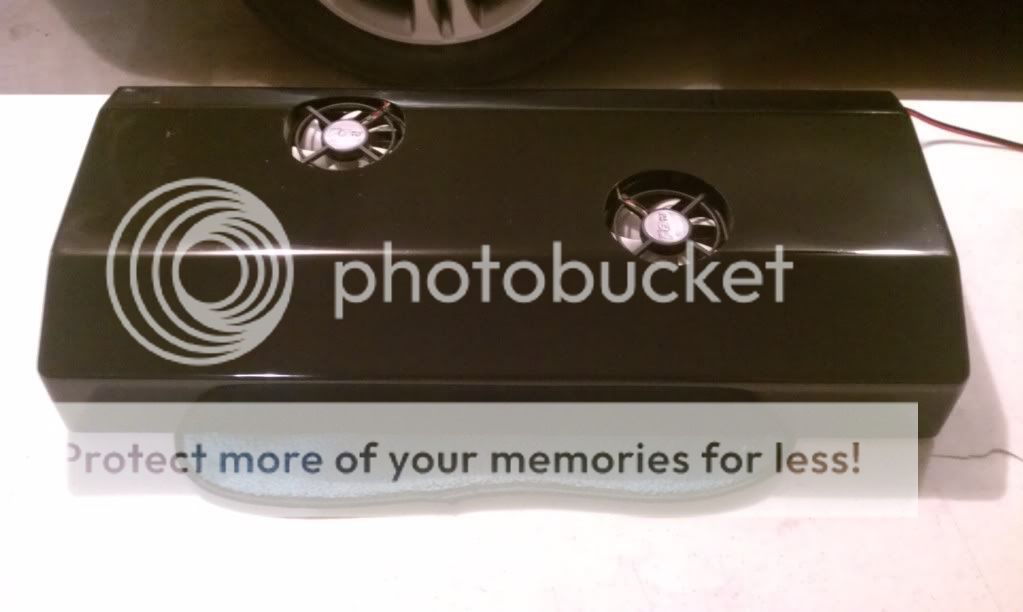
Notice only one power cord coming out.... getting the clutter cleaned up...got rid of a power strip!
IMAG0702.jpg

IMAG0704.jpg

I put an aluminum angle down the middle of the canopy to help keep it straight. After hanging all the fixtures, it will need to be beefed up. I'll either go to thicker aluminum, or a painted steel brace.

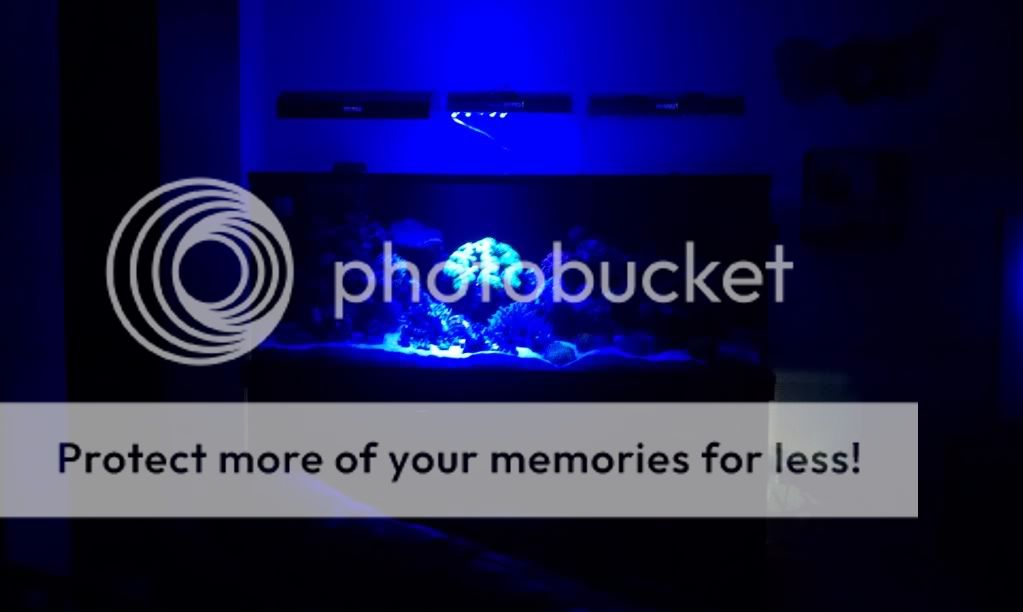
I'll post pics of them in action soon..... All I can say is that they are WAY brighter than the 400 watt halides I had before if I turn them to 100%. I have them turned down to 65% on the blues/mixed and 45% on the whites and they are very similar to what I had before (20k). And the dimming function is out of this world in conjuction with the strings of crees and 'zones' I arranged them in........ Let me know what you all think so far???
 

lesd

Supporting Member
Joined
Nov 15, 2004
Messages
658
Reaction score
29
Location
Cypress - near Barker Cypress/290
Have you seen any issues with tripping breakers or flickering household lights?

I saw some posts somewhere that raised a concern about using multiple ELN meanwell drivers. They have a high inrush current (on the datasheet) and are not power factor corrected.

My instinct is that this concern is overblown - it looks like you are running 18+ drivers. Are they all on one 20A household circuit?
 

gabe_j

Guest
Joined
Aug 14, 2010
Messages
1,389
Reaction score
0
Location
clear lake
according to meanwell's tech team you can run 13 drivers on 1 ac cord/circuit safely.
 
OP
OP
T

thereefranch

Guest
Joined
Mar 3, 2007
Messages
23
Reaction score
0
Location
Cypress
You can find the spacers here:

http://www.mcmaster.com/#unthreaded-spacers/=ez82pc

As for light flickering.....none on the fixture or in the rest of the house. Must be myth.

All lights are on one power strip that has its own 20A fuse. No problem here. Thats 17 drivers on one breaker. No issues.

With the boostled controllers, you only plug the fixtures in once. The controllers turn the drivers up and down or on and off so to speak. So when the lights are off, there really is no power running through the system. All the drivers are stone cold. I would imagine the current increases as the drivers increase the lights towards their pre-set amperage. Since dimming is done over a period of time (in my case I have them set for 2 hours), then the current draw slowly increases...... and then reverses as the lights dim toward the 'sunset' of the evening.

One thing I have noticed is that some of the leds glow slightly after they turn off. I think this may be due to capacitors unloading. Same for the in rush current, the capacitors in the driver powering up. Im not an expert, nor want to be, so I could be wrong. Just my observation.

At least you all can see that 17 drivers work on 1 - 20A Breaker. There are 8 more drivers to be used on the back fixtures that will replace the VHO Actinics. I'll let you know then how 25 drivers does.

On a side note, you all know that I'm plugging in 6 drivers at one time max. I'm not plugging all 17 drivers in at the same time. So the in rush current of 6 drivers does not exceed the 20A breaker. And then as I plug additional fixtures in, the inrush plus the pluged in fixtures doesn't exceed the 20A.....and so on.
 

flexrac

Guest
Joined
Mar 19, 2009
Messages
5,222
Reaction score
14
Location
Remington Ranch
thereefranch said:
You can find the spacers here:

http://www.mcmaster.com/#unthreaded-spacers/=ez82pc


On a side note, you all know that I'm plugging in 7 drivers at one time max. I'm not plugging all 17 drivers in at the same time. So the in rush current of 7 drivers does not exceed the 20A breaker. And then as I plug additional fixtures in, the inrush plus the pluged in fixtures doesn't exceed the 20A.....and so on.

thanks for the link. i did not think you were turning all those drivers on at the same time. glad you posted that, hate to have any newb follow suite and not know better.
 

lesd

Supporting Member
Joined
Nov 15, 2004
Messages
658
Reaction score
29
Location
Cypress - near Barker Cypress/290
Glad to hear that. I was a little worried about the inrush current, and even considered getting an inrush current limiter for my build. Doesn't seem necessary.
 
OP
OP
T

thereefranch

Guest
Joined
Mar 3, 2007
Messages
23
Reaction score
0
Location
Cypress
I have the lights hung above the frag tank and 220 show tank. Here is a pic of the 220 tank with just the (2) - 22" and the 1 - (18 ) fixtures. I have them 11" above the water. They are more than (3) - 400 watt m.h. I have them turned down to 80% blue and 45% white. I ordered a few more Royal Blues to replace a few of the whites. I hope to be able to turn those up and keep a 20K look. If I turn them up now, it gets a 14-15k look.

IMAG0791.jpg


I have the mold for the cover that fits the 22" made. I will be laying up the carbon fiber enclosure tomorrow and with luck installing it on Sunday. I will update with pics as soon as possible.

What size heat sinks is everyone using? Let me know what you have, or what you may build. After you see this first cover, you'll want it for yours...

Anyone take advantage of Rapidled.com Black Friday Sale..... 15% off Crees and 20% off Drivers and Accessories....no better deal.....one day only!
 
OP
OP
T

thereefranch

Guest
Joined
Mar 3, 2007
Messages
23
Reaction score
0
Location
Cypress
Thansk a lot for the nice comments. I just recently re-built the tank. I had a case of 'blue snow flake polyps' that I cleaned out. Doesn't have the 'grown in' look yet, but it will soon.

Update on the fixtures:

The 8.25" x 22" enclosure mold was changed into a 2 piece mold to be able to get the part out better. I'll be able to make one tomorrow, so were just a day off.

I have a 4.25" x 9" enclosure mold just about complete. This is a popular size for 8-12 crees. I'll have pics shortly.

The original frag tank enclosure will be started next week. It takes about a week to get the mold made.
 
OP
OP
T

thereefranch

Guest
Joined
Mar 3, 2007
Messages
23
Reaction score
0
Location
Cypress
I got a proto-type 22" enclosure made. It fits well. I'll need to sand the mold and get a few of the imperfections out. And the final Carbon Fiber one should be close to flawless. I made this one out of fiberglass and painted it black. Here are a few pics:

What I'm enclosing:
IMAG0714.jpg


The proto enclosure:
Top:
IMAG0155.jpg

Side:
IMAG0157.jpg

Back:
IMAG0159.jpg

Bottom:
IMAG0161.jpg

The enclosure is flush with the splash shield. Makes picking it up very easy. And it is less delicate. I ended up getting some shorter spacers for the spash shield that puts the shield about 1/16" away from the optics. It made it where the optics can't come off, which is a nice feature. They are 1/2" tall.
IMAG0162.jpg

The Boostled.com controller fits nicely in the front. I cut an opening for it and mounted it with Very High Bond Double Sided Tape. I will drill 4 holes accross the bottom for the buttons. I will end up making some plastic extensions to reach them. For some reason they put the buttons back from the face. No worries....extensions to come!!
Side:
IMAG0158.jpg

I made the fan openings large and have the fans blowing up (hot air rises). They are not noticeable when the fixture is mounted. As far as I'm concerned, this is by far and above the best cooling option of any fixture I have see. I don't like drawing the air up from the bottom regardless of where it flows (radion) (check the splash shield 10" off the water and watch the salt spots build), and most DIY web shops tell you to blow down on the heat sink. That may work well without an enclosure, but it doesn't with one. I tried both ways.....the heat sink is at least 7-8 degrees cooler running this way versus blowing down.

The side vents draw air in nicely and add a touch of polished aluminum since the ends of most heat sinks are shiny. It actually looks really nice in glossy black. The fiberglass can be painted any color. White would look good too. I used spray paint from Walmart. I will use automotive clear coat on the carbon fiber units.

Pics with it mounted. These shots have just 12 blue crees going in the middle fixture. I'll take some pics tomorrow when the lights are all on. Looks really cool.
IMAG0164.jpg

IMAG0165.jpg

IMAG0167.jpg


I have plans on adding some glowing accent lines to the face of the enclosure. They will run left and right away from the face of the controller. I plan on using stray light and colored film mounted on the inside of the enclosure. I'll work on this tomorrow and should have them in the pics with the lights fully on.

LMK what you all think...... been a ton of work, but well worth it so far.
 

maconbits

Guest
Joined
May 24, 2011
Messages
315
Reaction score
0
Location
Houston Tx
i love it and would love one for my frag tank, if you ever want to build one bro, im totally up for it lol
 

oldmantran

Guest
Joined
May 30, 2011
Messages
665
Reaction score
0
Location
Rosenberg 77469
have you measured the temperature inside the enclosure? My concern would be in the small computer fans inability to move enough air.

The look is very clean. Congrats.
 

flexrac

Guest
Joined
Mar 19, 2009
Messages
5,222
Reaction score
14
Location
Remington Ranch
Should be no diff than a retail fixture, i am sure he accounted for that. Plus with leds from what i have experienced, will get the heatsink hot but once air hits it,
It cools down fast.
 

ModAquatics

Supporting Member
Joined
Jul 24, 2011
Messages
188
Reaction score
12
Location
Katy, TX
Very nice work! Perhaps you can make one to fit our 6x12 boards. People will pay for that.
 
OP
OP
T

thereefranch

Guest
Joined
Mar 3, 2007
Messages
23
Reaction score
0
Location
Cypress
I will pull the fixture down and experiment with it later today. I'll plug it in and make the leds run full power for 20 minutes and take a few temp measurements. Then, I'll reverse the fan and try again (let the unit cool first, then warm back up for 20 minutes).

I did this experiment without the enclosure and found the heat sink to run 7-8 degrees cooler with the fan blowing up. If you look at the driver installation, you will see that they(the drivers) make a channel under them. The air coming in the sides of the enclosure are lined up to flow directly down those channels....to the fan.....and then up and away from the unit. (wish I knew how to do graphics better)

Consider this as well...... if I had no fan......the unit would heat up and the 'convection air current' that is generated would follow this path:
1) enter in the side vents,
2) flow down the channels,
3) and out through the top.
Since the top cut-outs are higher than the sides, the air would almost act like a siphon (hot air rises). So with a fan pointing down, it is counter-productive. With it pointed up, it accelerates the flow.

If you had a heat sink with no drivers (and thus no channels), the fan would work better pointed down.

Like I said earlier, this is the most aggressive cooling I have seen in any fixture out. In my application, there is room for up to 4 fans if needed.

Also, I want to mention that I have only had the fixtures above the tank for what.... 2 weeks now..... I'll lay money down on the acropora growth that I see. I have a Pink/Peach Digi at the top left that has large white growth tips. And I just got a DFS Strwaberry Shortcake frag and ORA Red Planet frag and both have 3-4 growth tips emerging. I just got them about 10 days ago. Look, I have been in the hobby for 20+ years, grow acro into huge colonies (ask Qu at tnt) and I will assure you that this is the way to go.

As for Color; the corals pop like never before...... not even a Radium or Ushio 20k+ comes close. And the sun-up, sun-set function will blow you away if you never had it before. I know, I sat there wondering what all the hype was as I gazed at my 3 - 400w metals..... yeah, there really is a difference.

As for power; the 72 cree fixture is about equal to a 600 watt metal halide if turned full up. I noticed some bleaching of the lower corals in my tank and had to turn it down to about 50% power to start. I have them about 75% power now. All corals look as good or better than before and any bleaching is gone.

IMO: If you want a 400w equivalent, then ~48-60 crees would do the job.
A 250 watt eq. would be ~36 crees. And a 150w would be in the 20-24 range. I have about $650 in one 22" fixture. If I had to buy the enclosure, I would estimate it at a $50-$60 kit, so I'm out the door for about $700 with a professional looking fixture. (it is overkill, but I can run them less than 100%)

I hope this information is helpful for those looking to upgrade. I tried to answer a lot of the questions I had when I first dove into my led project. Let alone a large fixture like this.....
 

ModAquatics

Supporting Member
Joined
Jul 24, 2011
Messages
188
Reaction score
12
Location
Katy, TX
Saw the tank the other day so I thought I would add some pictures. There are obvious nice corals but in person it is even better.

MA290816.JPG


MA290817.JPG


MA290818.JPG


MA290820.JPG
 
Top