Ok, well the build is going to go in fast-forward, as the tank is up and running, and unfortunately I wasn't as religious in taking my construction pics as I wish I had been, but here we go.
I bought my 140 gallon tank on MARSH probably in January 2007 from a guy in Clear Lake. It came with a skeleton stand made out of 2x4s and 2x6s.
I was in the process of building my home, so it sat dry in my apartment for a few months. I started my planning for the actual tank, centering around a theme of two islands, with a lot of swimming space in between.
I want to preface this by saying that I "borrowed" quite a few ideas from people here and on ReefCentral (actually the stand I copied from one pic I found on one of those "Show your stand" threads). I think I borrowed more than one idea from CRVZ's tank - one of my fav's...
I had some family planning on coming to see the Pompeii exhibit this past summer, and I decided I wanted that to be my start up target, so I got to work. I decided to commit myself by purchasing some essentials:
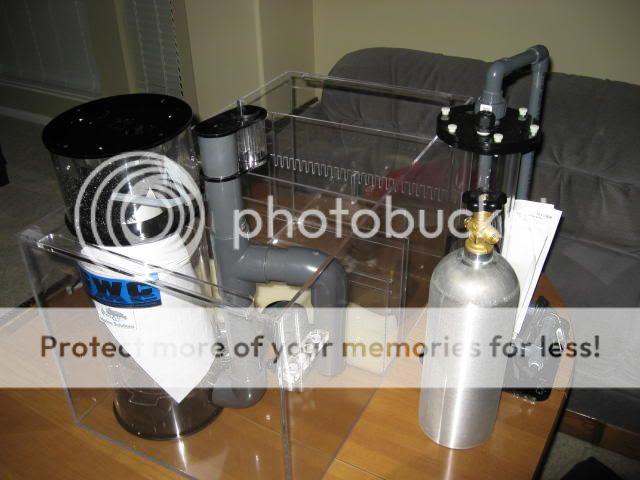
I got an MSX 200 skimmer, a MRC calcium reactor, two Eheim 6101 with the multicontroller, a vortech, my custom sump from Kevin at All About Fish, and my Reef Geek 8xT5 with Ice Cap 660's retrofit kit.
I figured I was thoroughly committed, and I should start on the stand. I built a Google Sketch-up model of the tank, stand and canopy to ensure I'd like the proportions of the doors, heights, etc. After that I realized I had no idea how to woodwork. Thankfully I have a brother who's a compulsive tool buyer - but only if they're 50% off or more. This coupled with a few books and a couple of helpful buddies and I was in business.
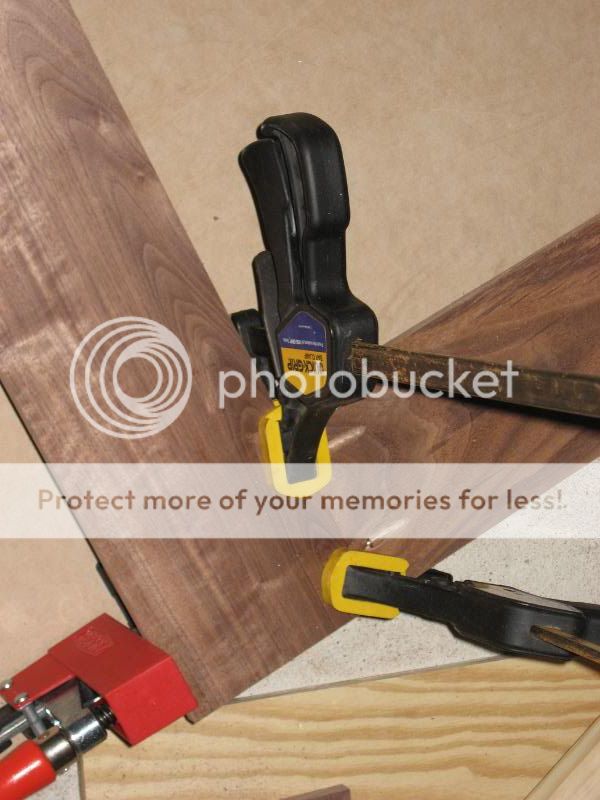
After my woodworking/finishing education was complete, I elected to use solid walnut for my face panels and canopy construction. After some long trips to Clark's Hardwood Lumber in the Heights (a fantastic place by the way...) I used 1/4" solid walnut, and I ripped it to width. I had quite a bit of internal debate of how I wanted to connect the face panels, but I ended up purchasing a $40 Kreg pocket hole kit, which was by far the best $40 I have ever spent. I pocket-holed the face panels, and also glued the joints
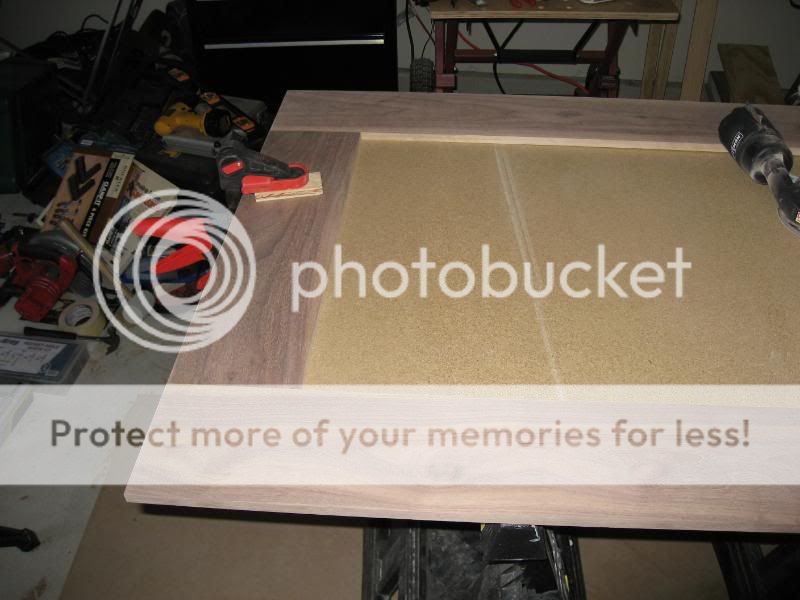
The outside showed no evidence of the joint once I sanded down the glue residue. One other thing to note was that I didn't use simple yellow wood glue, after talking with a guy on RC, I found out about this special glue that is basically a formaldehyde-based resin that uses walnut husk powder along with a salt as the catalyst/binding agent. The result was a water-soluble while wet and almost invisible (on walnut) when dry glued joint. After sanding down to 320 grit, I was ready to move on.
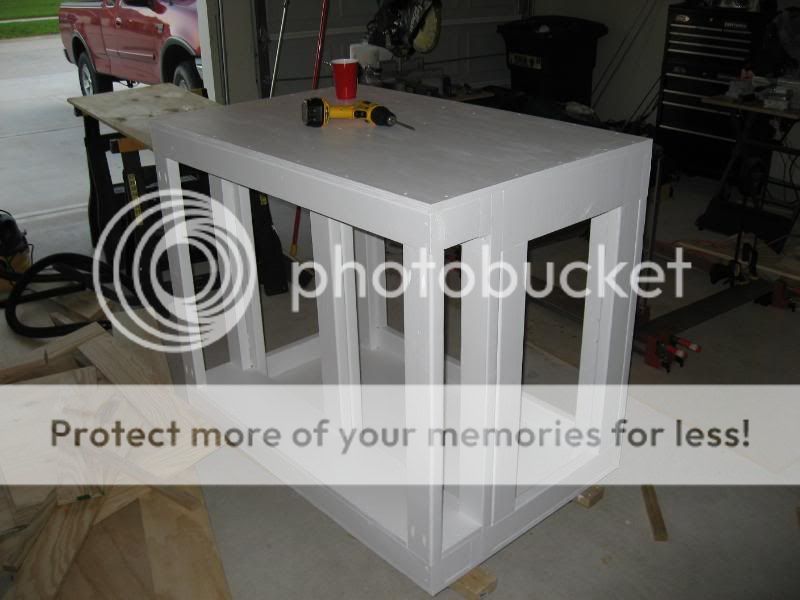
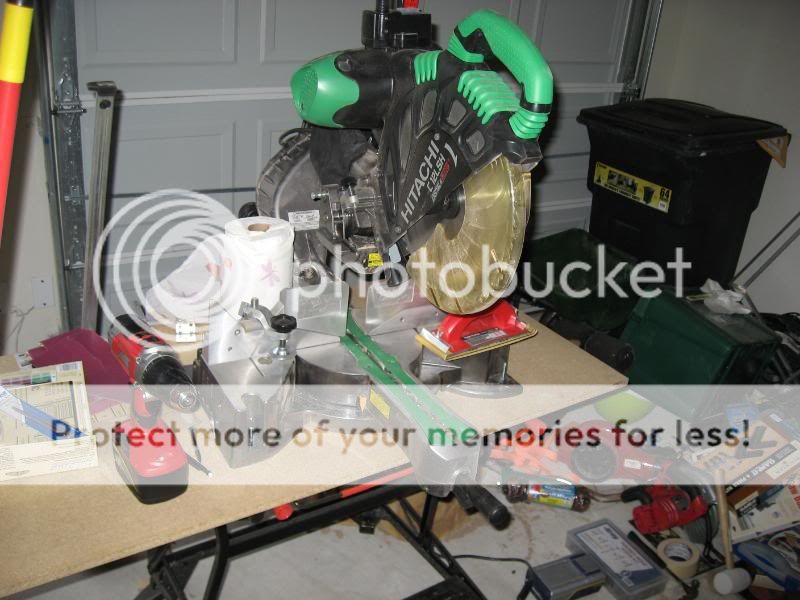
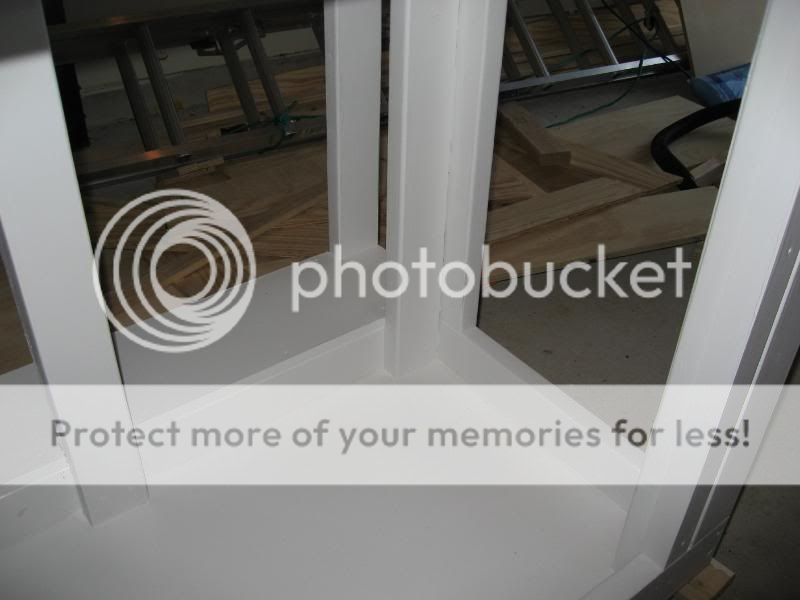
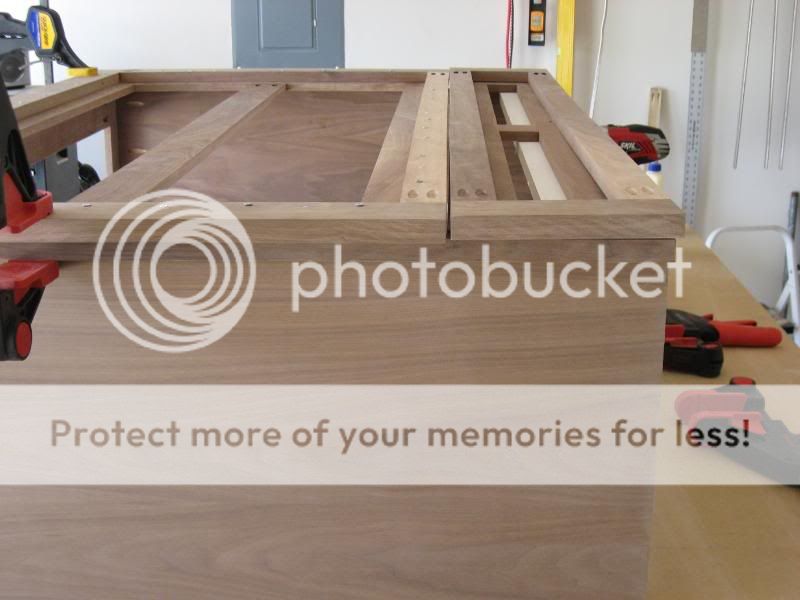
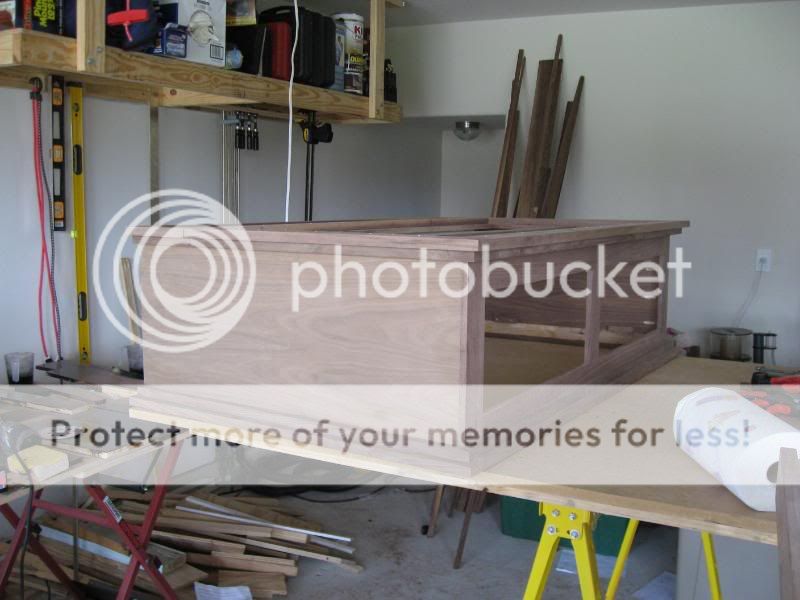
Well the first problem struck when I was about to affix the face panels (more on that in a sec). Well I had initially taken a framing square to the skeleton stand that I bought with the tank originally, but after putting up the face panels (held in place with clamps), the stand was too out of square to use. Also, the vertical supports were multiple 2x6s, which were overkill and that took away quite a bit of inside space. My buddy and I made an executive decision to rebuild the stand the right way. A quick trip to Lowe's and we had all the requisite lumber to accomplish the task. Maybe a bit because he felt sorry for me, and more probably because he wanted a bigger miter saw than his pops, my buddy picked up this, which made the construction much easier:
I changed up the design on this new stand to use multiple 2x4s as the vertical supports (which is still technically overkill...) I had retrofit an extension along the back of the tank on the old stand, but for the new tank, I just built the entire thing 7" deeper than the tank front-back dimension. I built two back vertical support sets - one under the edge of the tank, and a lighter one at the back of the stand itself
Also I recessed the bottom and sealed it to be a water-tight compartment to hold in leaks (already tested that one out!). I painted the entire stand with KILZ, and then the lower compartment I coated a few times with white garage floor one-part epoxy. I then sealed all the seams with liberal amounts of silicone.
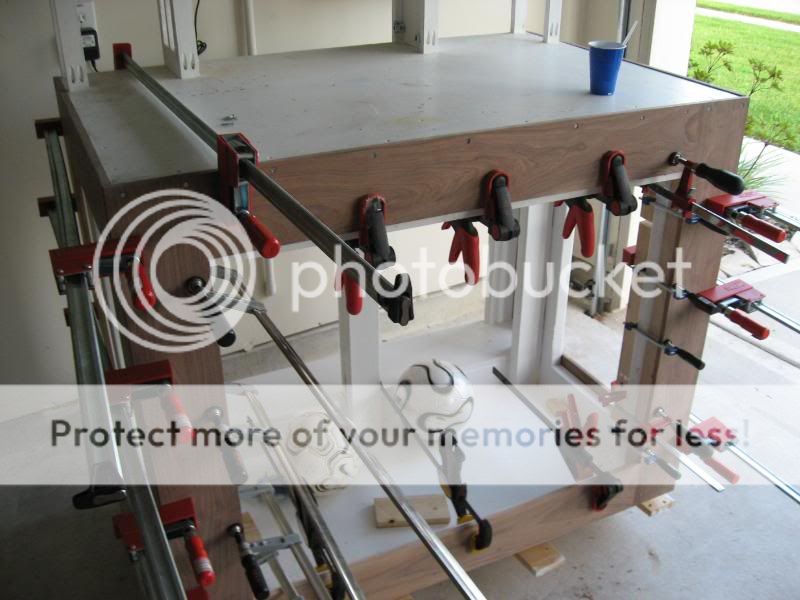
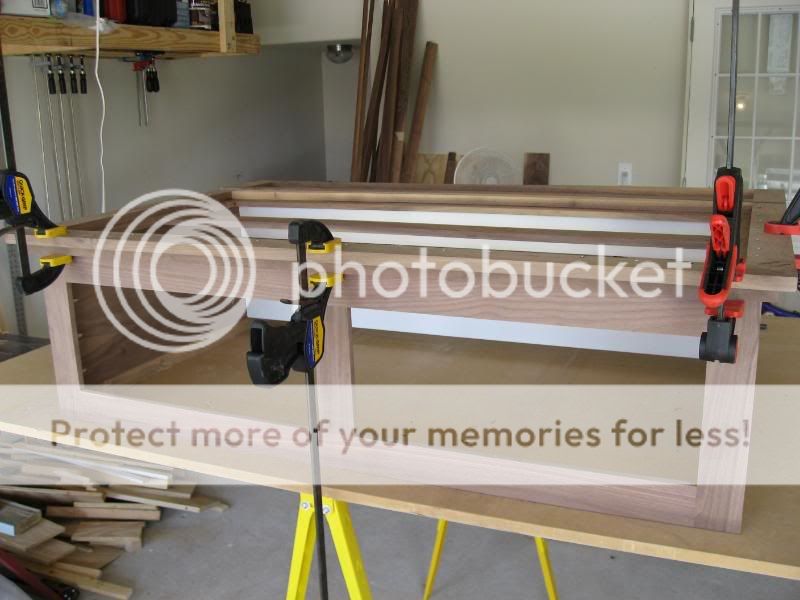
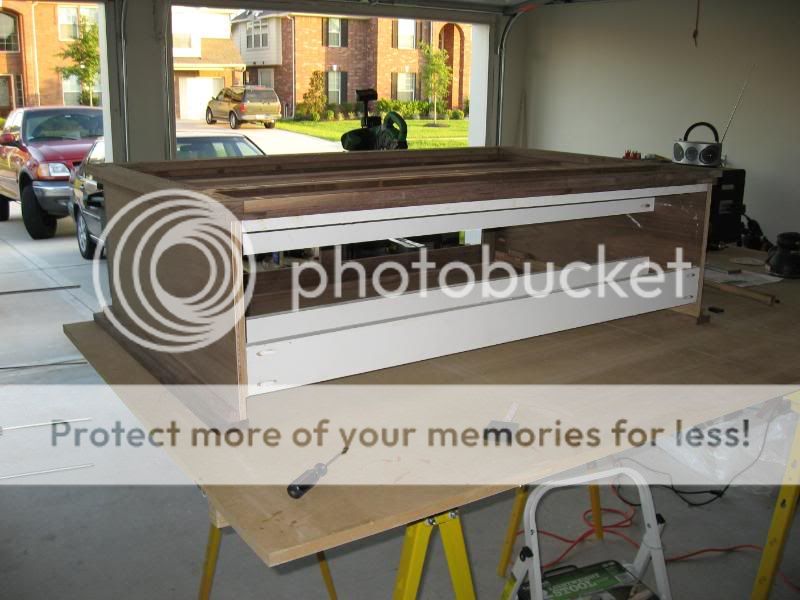
With this new skeleton stand in place, attached the face panels. I did this with quite a bit of glue and clamps:
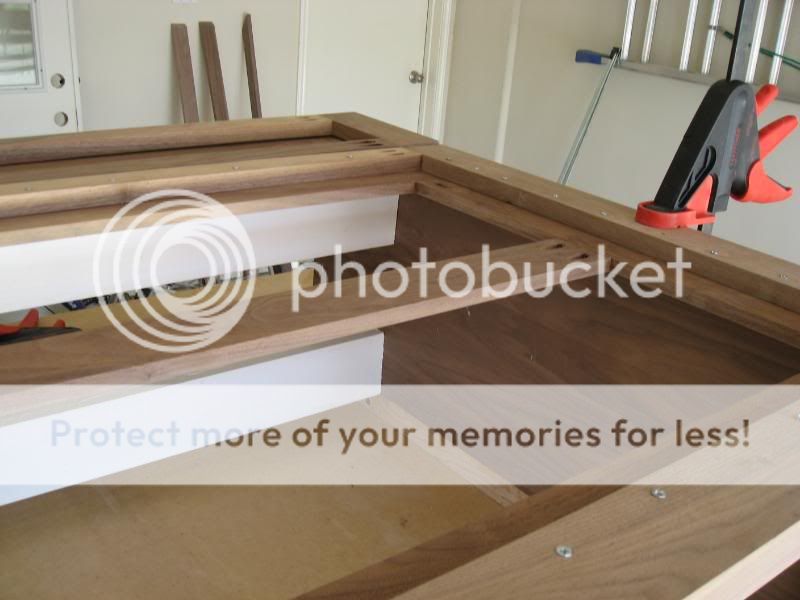
I was able to screw the face panels into the frame at the top and bottom, as the trim piece hid all of those screw holes. After this, I was able to glue the bottom trim on, and cut and pocket hole the vertical supports for the top piece
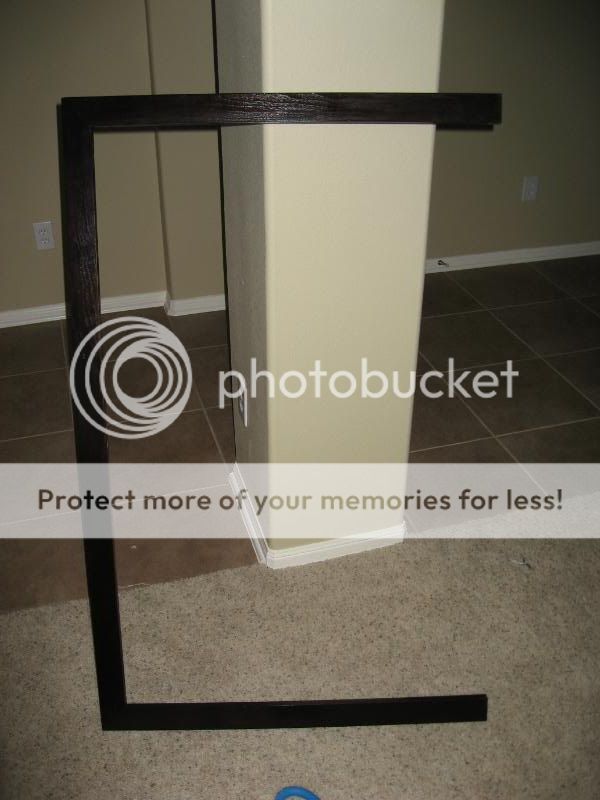
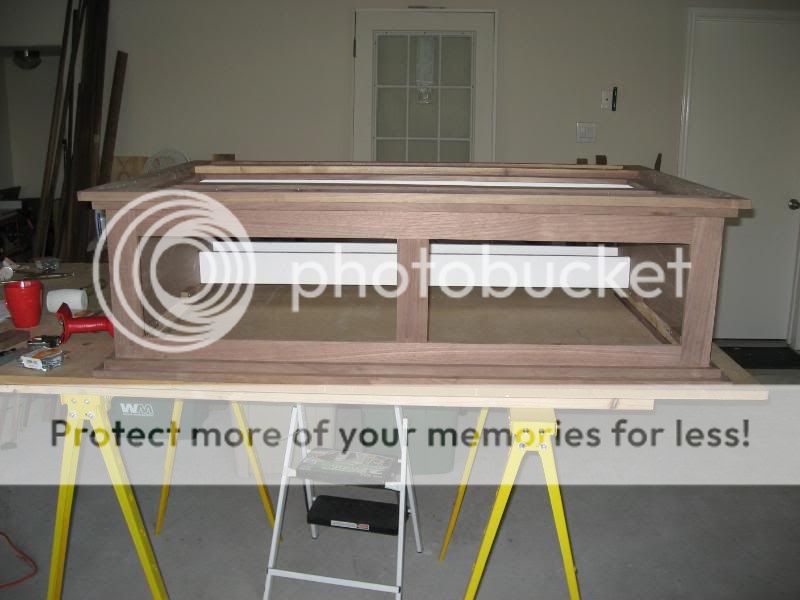
My goal for the stand and canopy were to not have any screw/nail holes, and to cover all of the black plastic trim of the aquarium itself. To accomplish this last part, I built a top trim piece that fit flush (with about 1/8" to spare on top of the vertical trim at the top of the aquarium. After thinking about it, if I ever wanted to remove the tank - I couldn't glue the top trim down. So I dowelled the top piece to make it removable, which worked out pretty well.
Now onto the canopy. I set out to build the canopy with 1/2" solid walnut as well, but I ran into a bit of trouble. I couldn't get solid walnut wide enough to make into the sides of the canopy without buying a 2/12 and milling it down to 1/2" which wasn't very smart. So I went with walnut veneer plywood on the sides, which wasn't my first choice, but once it was finished, it shouldn't look too different. Because my tank was so tall (29"), and I built the stand so tall, and the canopy was tall to accommodate the t5s without a glass top, access was a priority. To this end, I wanted the top to hinge open to allow me to remove rocks, etc
but also have front doors for simple reaching into the tank tasks.
I wanted to match the trim of the stand, and I had used 3/4" thick walnut for the trim on the stand for aesthetics. So I made the lower canopy top (where the light rack mounted) out of 1/2" walnut, and the upper canopy top out of 3/4" walnut.
This allowed the second upper canopy trim piece (which was 3/4" thick) to overhang the lower canopy top (which was 1/2" thick) by 1/4", covering the seam.

Because I went with a frameless canopy, I added some 1x4 supports on the back (over the 6" extension of the stand). This also gave me a point to mount my three fans on the back.
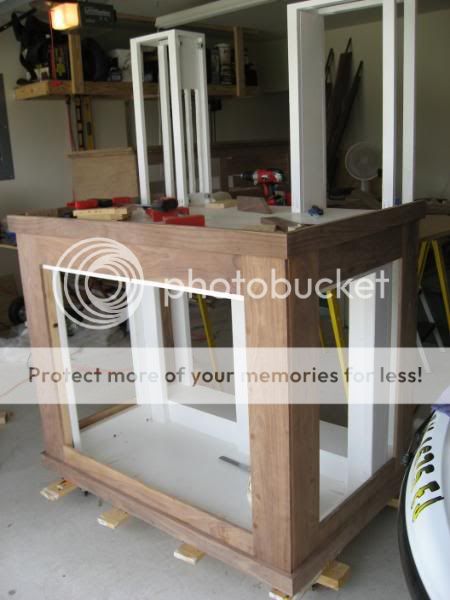
So the final product:
A few other things, since I had to use 3/4" ply on the sides, I rabbeted a 1/4" rabbet at the bottom, so the sides and front would mate up exactly like those on the stand. Additionally, the bottom trim on the bottom of the canopy actually rests under the top aquarium trim, hiding it. So you have to slide the canopy on and off.
I'll fast forward through the finishing, but suffice it to say it wasnt a fast process. I dyed the walnut and then filled the pores using an oil-based filler. After that I finished it with a wiping varnish.
Remember the family coming to visit? Well the night before, I was gluing on the corner trim on the canopy and stands, and finishing up some boo-boos. The morning of, we got the tank onto the stand about 5 minutes before we were to leave for the museum!

One thing to note is that these pics make the stand look really black. It isn't, but it is a definite brown. Everything I read has said that walnut fades, as does a varnish finish, relatively rapidly in the presence of sunlight. Because the tank is in the front room, it gets PLENTY of sun, so I stained it a bit darker than I wanted. It has been up for roughly 7 months, and it has already lightened considerably!
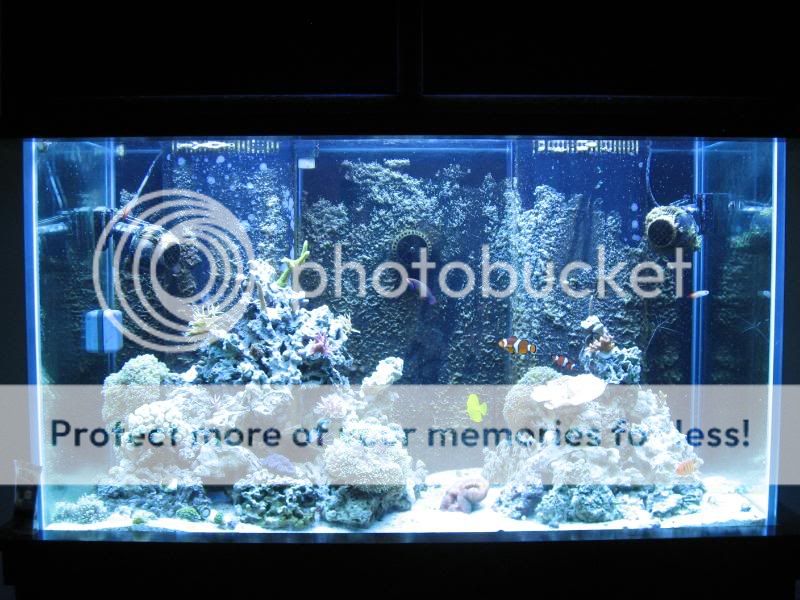
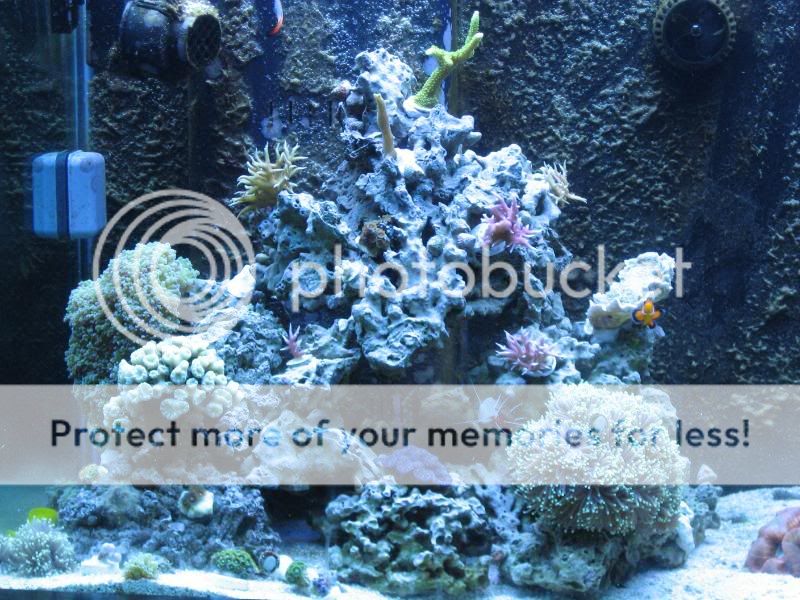
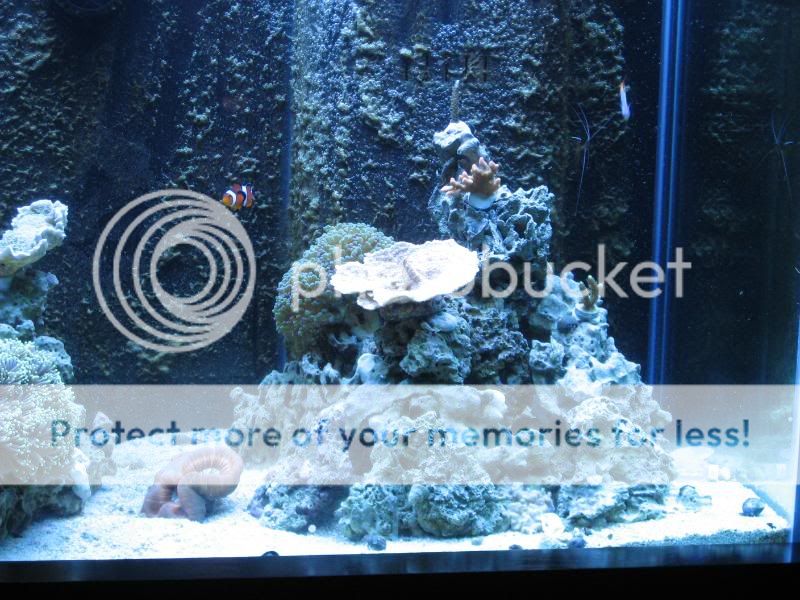
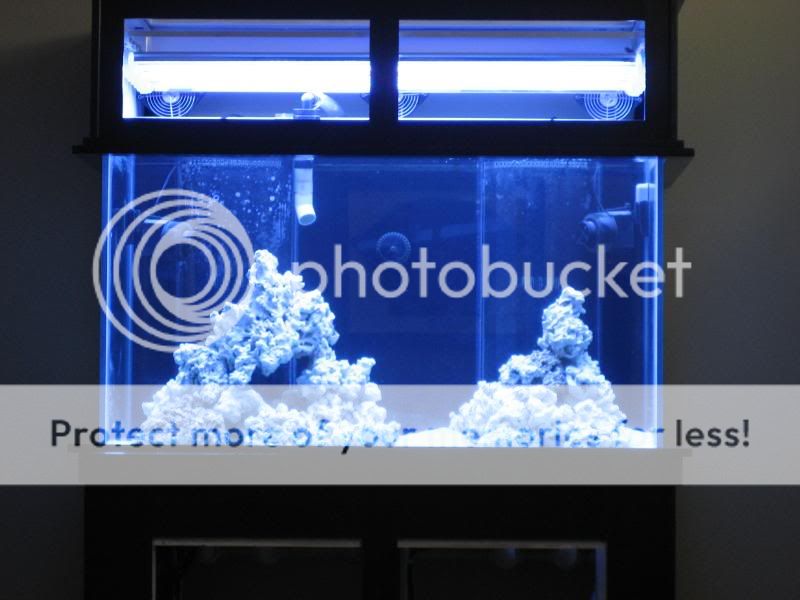
Once it was in place and plumbed, I was able to put in the Marco Rocks I had had "getting live" with some rock from another tank. I had soaked the Marco Rocks in a diluted vinegar solution for two days (one day too much), and then put it in saltwater with a few powerheads and live rock. After a long two day fill-up with the RO unit, I was able to get the rock in place. When I had gotten the rock, I arranged it how I wanted, but during the curing process, all was lost, and I couldn't replicate it. But the end result is pretty similar
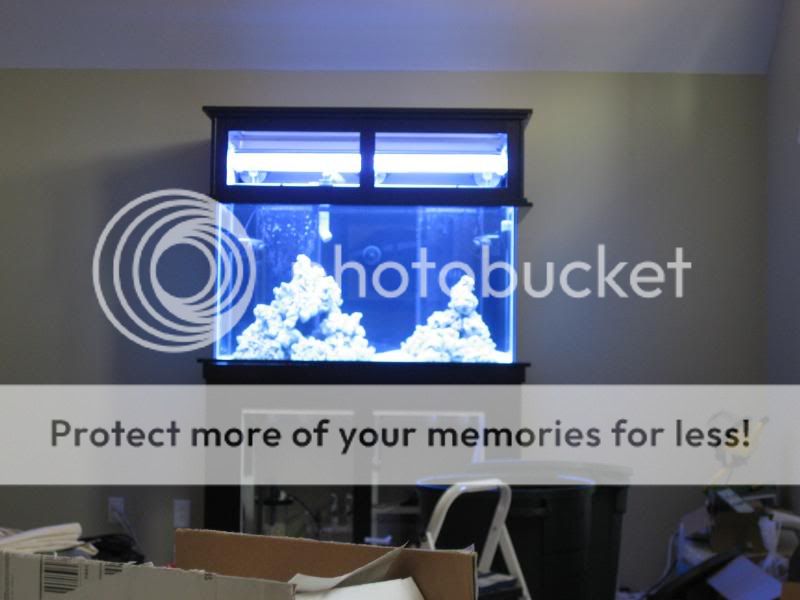
Again, I wanted two islands with a channel between them with a lot of swimming space and open rock work. I think I got that.
I attached the lights onto a light rack built from angled aluminum riveted together. That light rack was then screwed into the lower upper canopy frame... clear as mud...?
I didn't build the doors, I had bought them, but they were a few weeks behind the finishing process, as I didn't have enough garage space for them as well as the stand and canopy.
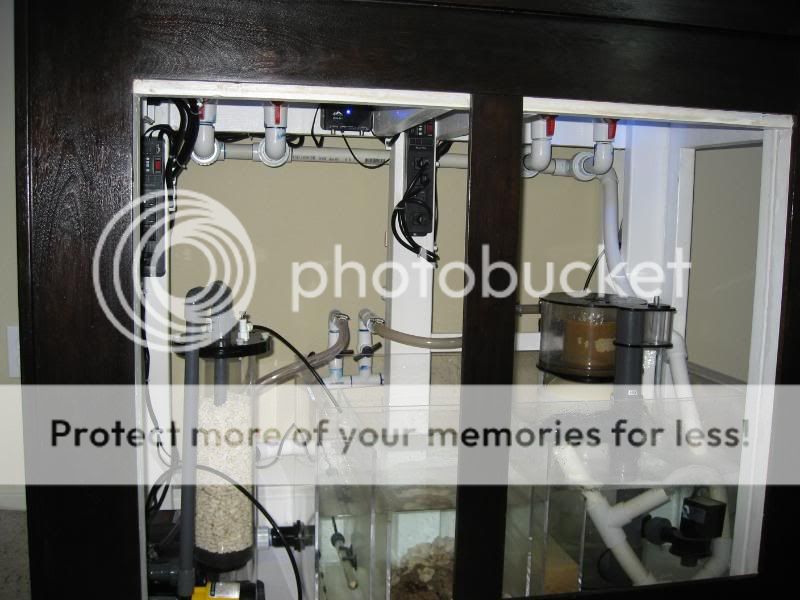
And under the hood:
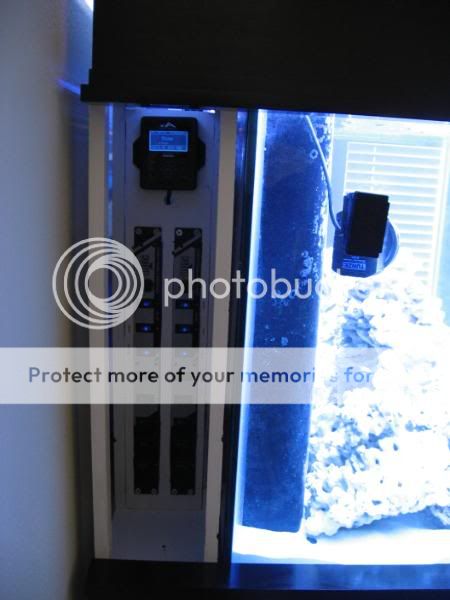
You may have been wondering after looking at some of the previous pics, what the boxes above the stand were, or why the 7" stand extension. Well, I had more equipment then I had stand space, so the 7" extension helped with that. But also, I wanted to not have the ballasts under the stand. Furthermore, power is provided by a separate 20A circuit with two American DJ power strip knock offs (because I wanted the blue switches") ) and I didn't want those underneath easier. I also had a Reef Keeper Elite that I wanted to mount out of the stand, but not on the outside. And finally I had the Tunze controller, Wavy Seas controller, and Vortech controllers to mount. Basically I built face panels that will be covered by access panels matching the stand/canopy (to be built...).
) and I didn't want those underneath easier. I also had a Reef Keeper Elite that I wanted to mount out of the stand, but not on the outside. And finally I had the Tunze controller, Wavy Seas controller, and Vortech controllers to mount. Basically I built face panels that will be covered by access panels matching the stand/canopy (to be built...).
Left side with the ADJ knock offs and RKE:
And the right side with the Vortech, Tunze, and Wavy Seas controllers.
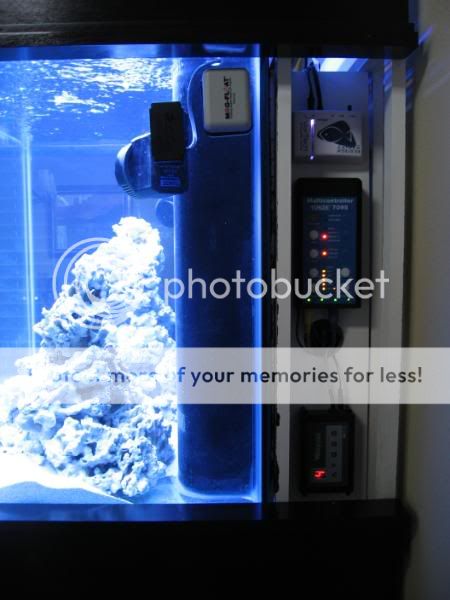
The ballasts are mounted on another panel behind the panel with the controllers. All face panels are removable so I can get back to the wiring behind.
So that's the build portion of my thread. I'll end with some specs and then add another post with livestock to date, etc...
I tried to make the tank as efficient and quiet as possible:
Lighting: 8x 48" T5s overdriven with Ice Cap 660 ballasts
Circulation: Two Tunze 6101s, One Vortech
Return: Eheim 1262
Skimmer: MSX 200
Calcium Reactor: My Reef Creations MRC1
Sump: Custom by Kevin at All About Fish with fuge, skimmer and return
Fuge Light: 96W PC fixture
Phosban Reactors: Two with carbon and GFO
Controller: RKE with dual pH probes (reactor and main tank)
Again, thanks to everyone who helped me get to this point (knowingly or unknowingly), and if ya'll have any questions, don't hesitate to ask.
I bought my 140 gallon tank on MARSH probably in January 2007 from a guy in Clear Lake. It came with a skeleton stand made out of 2x4s and 2x6s.
I was in the process of building my home, so it sat dry in my apartment for a few months. I started my planning for the actual tank, centering around a theme of two islands, with a lot of swimming space in between.
I want to preface this by saying that I "borrowed" quite a few ideas from people here and on ReefCentral (actually the stand I copied from one pic I found on one of those "Show your stand" threads). I think I borrowed more than one idea from CRVZ's tank - one of my fav's...
I had some family planning on coming to see the Pompeii exhibit this past summer, and I decided I wanted that to be my start up target, so I got to work. I decided to commit myself by purchasing some essentials:
I got an MSX 200 skimmer, a MRC calcium reactor, two Eheim 6101 with the multicontroller, a vortech, my custom sump from Kevin at All About Fish, and my Reef Geek 8xT5 with Ice Cap 660's retrofit kit.
I figured I was thoroughly committed, and I should start on the stand. I built a Google Sketch-up model of the tank, stand and canopy to ensure I'd like the proportions of the doors, heights, etc. After that I realized I had no idea how to woodwork. Thankfully I have a brother who's a compulsive tool buyer - but only if they're 50% off or more. This coupled with a few books and a couple of helpful buddies and I was in business.
After my woodworking/finishing education was complete, I elected to use solid walnut for my face panels and canopy construction. After some long trips to Clark's Hardwood Lumber in the Heights (a fantastic place by the way...) I used 1/4" solid walnut, and I ripped it to width. I had quite a bit of internal debate of how I wanted to connect the face panels, but I ended up purchasing a $40 Kreg pocket hole kit, which was by far the best $40 I have ever spent. I pocket-holed the face panels, and also glued the joints
The outside showed no evidence of the joint once I sanded down the glue residue. One other thing to note was that I didn't use simple yellow wood glue, after talking with a guy on RC, I found out about this special glue that is basically a formaldehyde-based resin that uses walnut husk powder along with a salt as the catalyst/binding agent. The result was a water-soluble while wet and almost invisible (on walnut) when dry glued joint. After sanding down to 320 grit, I was ready to move on.
Well the first problem struck when I was about to affix the face panels (more on that in a sec). Well I had initially taken a framing square to the skeleton stand that I bought with the tank originally, but after putting up the face panels (held in place with clamps), the stand was too out of square to use. Also, the vertical supports were multiple 2x6s, which were overkill and that took away quite a bit of inside space. My buddy and I made an executive decision to rebuild the stand the right way. A quick trip to Lowe's and we had all the requisite lumber to accomplish the task. Maybe a bit because he felt sorry for me, and more probably because he wanted a bigger miter saw than his pops, my buddy picked up this, which made the construction much easier:
I changed up the design on this new stand to use multiple 2x4s as the vertical supports (which is still technically overkill...) I had retrofit an extension along the back of the tank on the old stand, but for the new tank, I just built the entire thing 7" deeper than the tank front-back dimension. I built two back vertical support sets - one under the edge of the tank, and a lighter one at the back of the stand itself
Also I recessed the bottom and sealed it to be a water-tight compartment to hold in leaks (already tested that one out!). I painted the entire stand with KILZ, and then the lower compartment I coated a few times with white garage floor one-part epoxy. I then sealed all the seams with liberal amounts of silicone.
With this new skeleton stand in place, attached the face panels. I did this with quite a bit of glue and clamps:
I was able to screw the face panels into the frame at the top and bottom, as the trim piece hid all of those screw holes. After this, I was able to glue the bottom trim on, and cut and pocket hole the vertical supports for the top piece
My goal for the stand and canopy were to not have any screw/nail holes, and to cover all of the black plastic trim of the aquarium itself. To accomplish this last part, I built a top trim piece that fit flush (with about 1/8" to spare on top of the vertical trim at the top of the aquarium. After thinking about it, if I ever wanted to remove the tank - I couldn't glue the top trim down. So I dowelled the top piece to make it removable, which worked out pretty well.
Now onto the canopy. I set out to build the canopy with 1/2" solid walnut as well, but I ran into a bit of trouble. I couldn't get solid walnut wide enough to make into the sides of the canopy without buying a 2/12 and milling it down to 1/2" which wasn't very smart. So I went with walnut veneer plywood on the sides, which wasn't my first choice, but once it was finished, it shouldn't look too different. Because my tank was so tall (29"), and I built the stand so tall, and the canopy was tall to accommodate the t5s without a glass top, access was a priority. To this end, I wanted the top to hinge open to allow me to remove rocks, etc
but also have front doors for simple reaching into the tank tasks.
I wanted to match the trim of the stand, and I had used 3/4" thick walnut for the trim on the stand for aesthetics. So I made the lower canopy top (where the light rack mounted) out of 1/2" walnut, and the upper canopy top out of 3/4" walnut.
This allowed the second upper canopy trim piece (which was 3/4" thick) to overhang the lower canopy top (which was 1/2" thick) by 1/4", covering the seam.
Because I went with a frameless canopy, I added some 1x4 supports on the back (over the 6" extension of the stand). This also gave me a point to mount my three fans on the back.
So the final product:
A few other things, since I had to use 3/4" ply on the sides, I rabbeted a 1/4" rabbet at the bottom, so the sides and front would mate up exactly like those on the stand. Additionally, the bottom trim on the bottom of the canopy actually rests under the top aquarium trim, hiding it. So you have to slide the canopy on and off.
I'll fast forward through the finishing, but suffice it to say it wasnt a fast process. I dyed the walnut and then filled the pores using an oil-based filler. After that I finished it with a wiping varnish.
Remember the family coming to visit? Well the night before, I was gluing on the corner trim on the canopy and stands, and finishing up some boo-boos. The morning of, we got the tank onto the stand about 5 minutes before we were to leave for the museum!
One thing to note is that these pics make the stand look really black. It isn't, but it is a definite brown. Everything I read has said that walnut fades, as does a varnish finish, relatively rapidly in the presence of sunlight. Because the tank is in the front room, it gets PLENTY of sun, so I stained it a bit darker than I wanted. It has been up for roughly 7 months, and it has already lightened considerably!
Once it was in place and plumbed, I was able to put in the Marco Rocks I had had "getting live" with some rock from another tank. I had soaked the Marco Rocks in a diluted vinegar solution for two days (one day too much), and then put it in saltwater with a few powerheads and live rock. After a long two day fill-up with the RO unit, I was able to get the rock in place. When I had gotten the rock, I arranged it how I wanted, but during the curing process, all was lost, and I couldn't replicate it. But the end result is pretty similar
Again, I wanted two islands with a channel between them with a lot of swimming space and open rock work. I think I got that.
I attached the lights onto a light rack built from angled aluminum riveted together. That light rack was then screwed into the lower upper canopy frame... clear as mud...?
I didn't build the doors, I had bought them, but they were a few weeks behind the finishing process, as I didn't have enough garage space for them as well as the stand and canopy.
And under the hood:
You may have been wondering after looking at some of the previous pics, what the boxes above the stand were, or why the 7" stand extension. Well, I had more equipment then I had stand space, so the 7" extension helped with that. But also, I wanted to not have the ballasts under the stand. Furthermore, power is provided by a separate 20A circuit with two American DJ power strip knock offs (because I wanted the blue switches
) and I didn't want those underneath easier. I also had a Reef Keeper Elite that I wanted to mount out of the stand, but not on the outside. And finally I had the Tunze controller, Wavy Seas controller, and Vortech controllers to mount. Basically I built face panels that will be covered by access panels matching the stand/canopy (to be built...).Left side with the ADJ knock offs and RKE:
And the right side with the Vortech, Tunze, and Wavy Seas controllers.
The ballasts are mounted on another panel behind the panel with the controllers. All face panels are removable so I can get back to the wiring behind.
So that's the build portion of my thread. I'll end with some specs and then add another post with livestock to date, etc...
I tried to make the tank as efficient and quiet as possible:
Lighting: 8x 48" T5s overdriven with Ice Cap 660 ballasts
Circulation: Two Tunze 6101s, One Vortech
Return: Eheim 1262
Skimmer: MSX 200
Calcium Reactor: My Reef Creations MRC1
Sump: Custom by Kevin at All About Fish with fuge, skimmer and return
Fuge Light: 96W PC fixture
Phosban Reactors: Two with carbon and GFO
Controller: RKE with dual pH probes (reactor and main tank)
Again, thanks to everyone who helped me get to this point (knowingly or unknowingly), and if ya'll have any questions, don't hesitate to ask.