• Welcome back Guest!

    MARSH is a private reefing group. Comments and suggestions are encouraged, but please keep them positive and constructive. Negative threads, posts, or attacks will be removed from view and reviewed by the staff. Continually disruptive, argumentative, or flagrant rule breakers may be suspended or banned.

Slayer's 120 build thread (1 Viewer)

Users who are viewing this thread

Joined
Aug 19, 2008
Messages
910
Reaction score
54
Location
Tomball
So as most of you know we broke down our 180. We have decided to downsize due to time constraints. So we bought a 120 gallon RR, and are working on plumbing it through the wall into the sump room that we had built into the new house. I will get pictures up in a little while but so far we have the tank and stand in place, water filling, and have the plumbing run through the wall. Haven't gotten water circulating quite yet, but hopefully before I go to bed tonight it will be running.

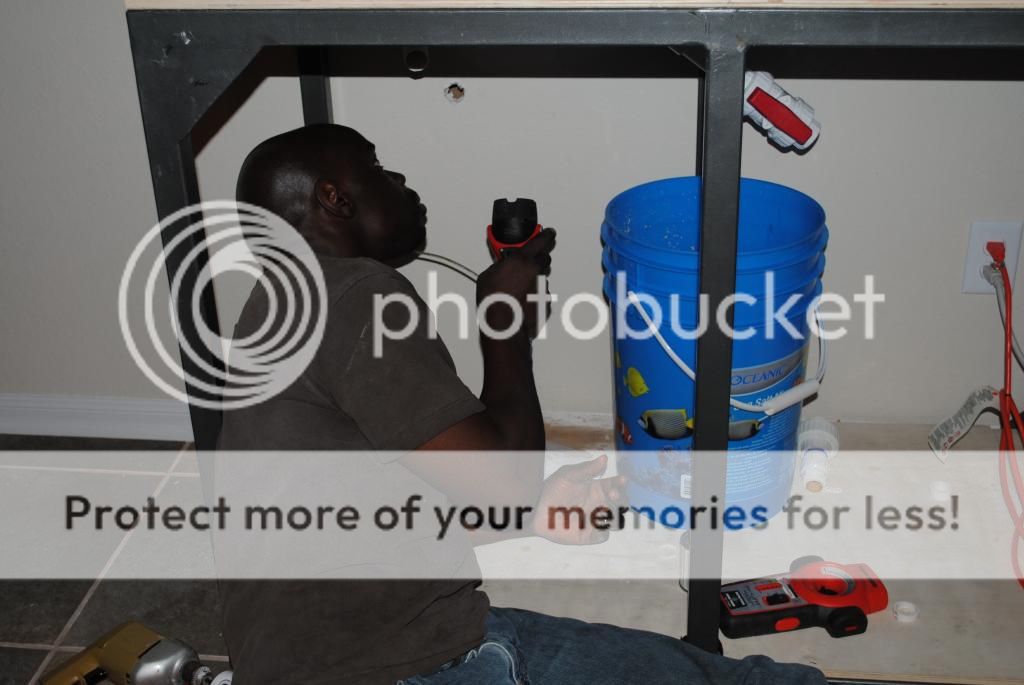
It has begun! Good ol Felix helping out! Thank you sir
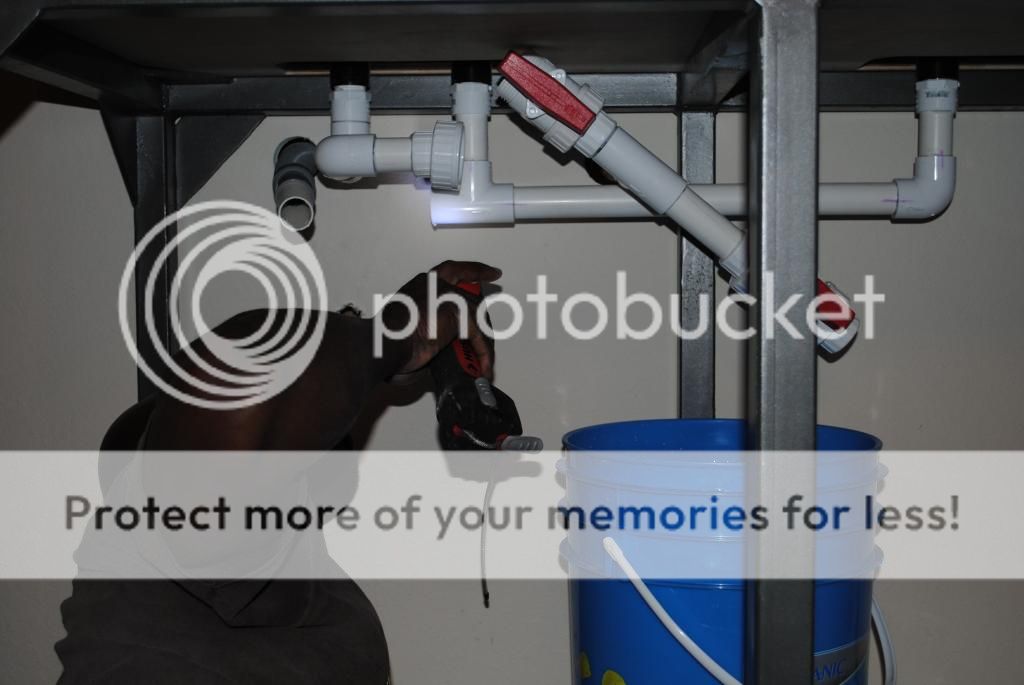
DSC_0035_zpse00504b8.jpg


Roughing it in!
DSC_0036_zpscdbb0796.jpg


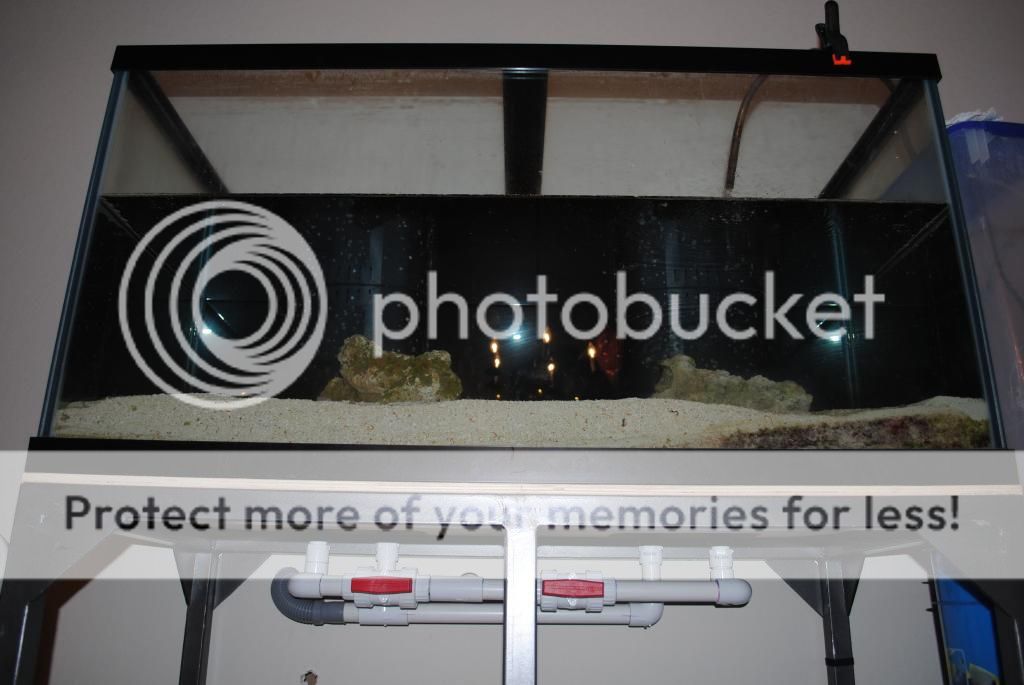
Plumbing finished, adding water!
DSC_0041_zpsa991bae1.jpg


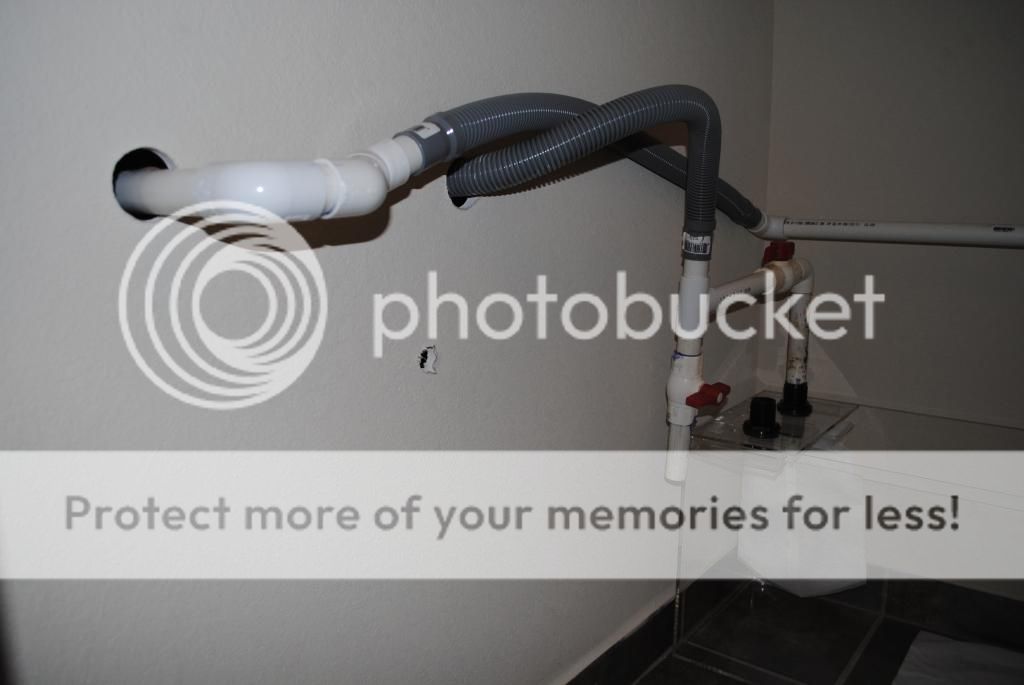
Breaking into the fish room! Ignore the oops hole lol
DSC_0039_zps22961ac5.jpg


Temporary plumbing in for drain lines, waiting for settling tank from Kyle at 3cc to be completed! Can't wait!
DSC_0043_zpsbd75b957.jpg


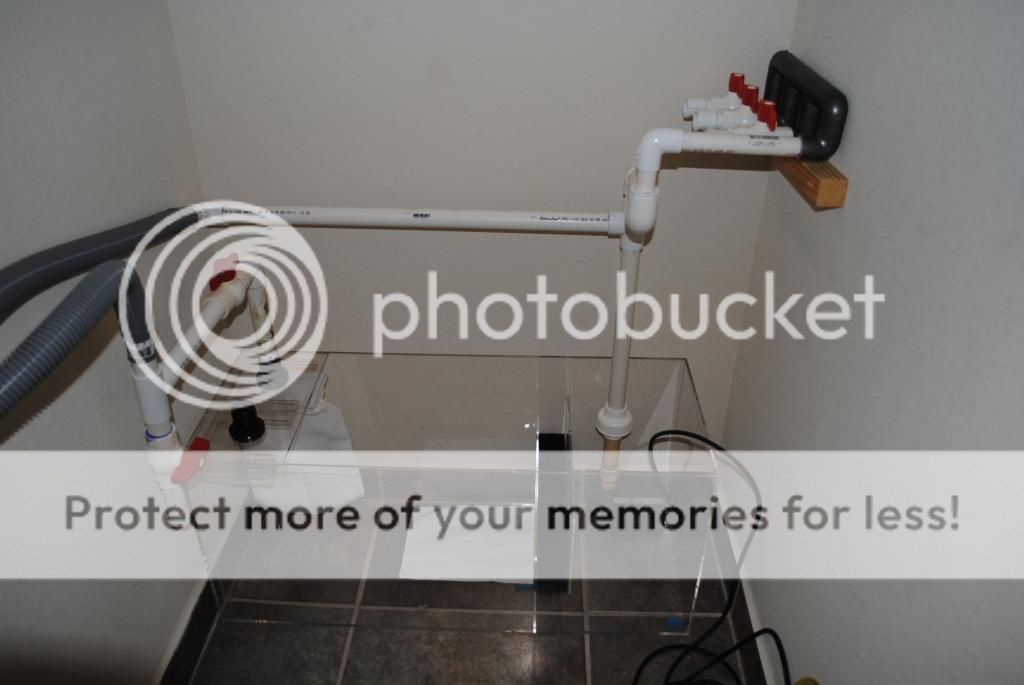
Done with plumbing for today! Love the new sump and how open everything is starting to look!
DSC_0042_zps53d271e4.jpg


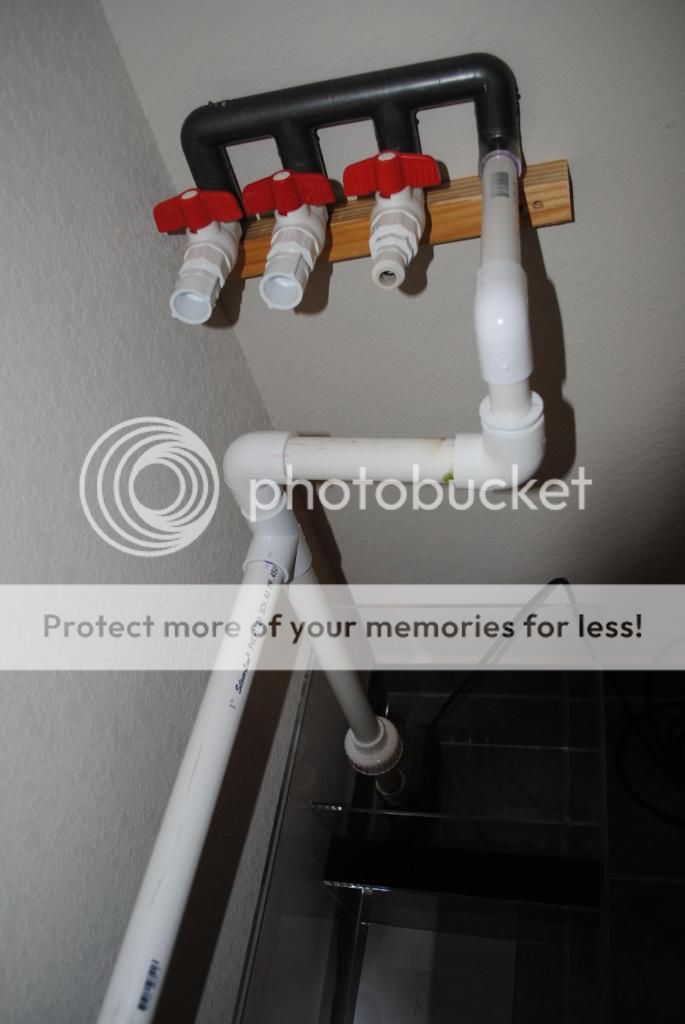
Closer look at the manifold i scavenged from the previous owners build, nice to have expandability!
DSC_0044_zpsa784be07.jpg


All for today, more tomorrow hopefully.
 
Last edited:
OP
OP
Slayer311
Joined
Aug 19, 2008
Messages
910
Reaction score
54
Location
Tomball
Woke up to a sump full of water this morning!, started up the return pump, added salt and we are officially cycling! The sand all died and had a lot of spiders in the base rocks that were sitting outside, gonna have a good old ammonia bloom for sure :)
 
OP
OP
Slayer311
Joined
Aug 19, 2008
Messages
910
Reaction score
54
Location
Tomball
The sump room is about 5x5 feet. I wanted the sump room to both cut down on sump noise in the living room and to provide more space to work on the life support equipment that often gets overlooked due to the difficulty of accessing it. (The 120 is now quieter than our 20g frag tank!)

I am having a settling / water change tank made by Kyle that will fit along the left wall and the display will be plumbed to first drain into this tank where I hope to have all the uneaten food and waste settle to the bottom of before overflowing to the sump. We had this phenomenon occur in our last sump design were I had a chamber that was initially going to be a display frag tank section of the sump, but because it was fed by the overflows, waste would accumulate on the opposite side of the tank from the overflow and would fall out of suspension due to the less turbulent flow of the overflows. I wanted to capitalize on this and have setup a tank designed to do the exact same thing and have a drain line plumbed to it so I can purge this waste water easily. I will be able to isolate the settling tank and re-direct flow directly to the sump for the time it takes to drain the settling tank to the drain we had installed in the floor and then refill and mix new salt…an easy 50gallons water change, almost completely hands off.

Along the right wall we will have our ATO reservoir plumbed via the water line I ran to the sump room through the ceiling and will mount the RO/DI above it for easy access / media change. We are in the process of buying a new SRO 2000 int skimmer and a Apex lite to control it all . We have a 8 bulb tek that will light the display and once the cycle is nearing completion we will be purchasing a new sunbrite 4foot f-series LED fixture to light the tank. More pictures to come as things get completed. Any masters of wire management have any ideas on how to route the wiring in this small room? I want everything to look as tidy as possible.
 
Last edited:

Pure Magic

Guest
Joined
May 18, 2012
Messages
292
Reaction score
0
Location
Richmond
The build is coming along good. I really like the pipe work and sump room. That sump is really really nice.
 
OP
OP
Slayer311
Joined
Aug 19, 2008
Messages
910
Reaction score
54
Location
Tomball
Well, when it rains it poors I guess. Will have to cut out all the plumbing under the tank and redo, several bulkheads are leaking with no real way of quick disconnect to fix :/. And then the ato got stuck on and flooded the sump a bit into the sump room. Thank god we have a floor drain and splash tiles I guess.
 

Traclly Le Tran

Don't mind me...
Supporting Member
Joined
Jun 11, 2012
Messages
1,241
Reaction score
5
Location
Rosenberg
Sorry to hear hope you get it fixed.

*Sent from my little corner of the reef. Nano nano!*
 

03BlackGT

Guest
Joined
Jan 3, 2012
Messages
21
Reaction score
0
Location
West Houston
I would definitely go with unions just after the bulkheads under the tank. They are you friend and make adjustments a breeze.
Looks good. Can't wait to see it finished. Glad to see the tank has a good home

Sent from my Nexus S 4G using Tapatalk 2
 
OP
OP
Slayer311
Joined
Aug 19, 2008
Messages
910
Reaction score
54
Location
Tomball
Great news! Got all leaks fixed..we are back on track!!! and got a shiny new piece of equipment today...wasn't the skimmer I was hoping for, but lets just say we will soon be able to check on our tank from the web :) Helloooooo my new friend! Apex :)
 
OP
OP
Slayer311
Joined
Aug 19, 2008
Messages
910
Reaction score
54
Location
Tomball
Next update...the new settling tank should be ready for pickup today!!!!!!!!!!!!!!!! I'm excited about getting this plumbed in! Will post more pics later after I get it home.
 
OP
OP
Slayer311
Joined
Aug 19, 2008
Messages
910
Reaction score
54
Location
Tomball
DSC_0064_zps389227aa.jpg

DSC_0065_zps93b4ba1d.jpg


And here she is filling with water, you can see the slanted bottom to help push waste to the drain line on the left and filling with water!. Can you say easy water change? :)

DSC_0066_zpsf22b8e05.jpg
 
Top